Roasted Radishes & Garlic Aioli

radish recipes, roasted radishes, garlic aioli, personal chef, caterer, Nashville TN, food photography, vsco photosThe winter entered through the back door a little prematurely. Autumn was slowly taking steps backward to make way for the hues of blue, the last leaves to fall away from the branches of soon-to-be withered trees. You know, the ones that cast shadows behind the street lights at night. I’ve become used to hearing the wailing of those who lament winter’s arrival; grumbling  about how their desire for summer to come back because the spring time wreaks havoc on their allergies.

Roasted Radishes : The Salted Table dot com


roasted radishes, The Salted Table, food blog, personal chef, caterer, eat local


Roasted Radishes : The Salted Table dot comAs a child I had both allergies and asthma, two diseases that still bring me grief today. But I still have an appreciation for every season because the details are different; and the arrival of spring blooms versus the color change of the leaves in autumn are all things to be appreciated. And winter’s vegetables are some of my favorite to consume. The vibrant shades of cabbage nestled against the neutrals of potatoes and a splash of hearty greens all ready to be made into delectable soups, stews and pickled things if you’re skilled enough to take on the challenge.

Roasted Radishes : The Salted Table dot comI was a strange kid if you were to inquire from the right family members. I was a lover of all vegetables with the exception of okra, it had to be fried and practically burnt for me to find it palatable. Of course, I’ve since matured and adore it fried or pickled, but still slightly burnt (old habits die-hard). But enough of memory lane, lets talk radishes. My only familiarity with radishes growing up was at church potlucks on crudités platters and they were always the last thing left, along with celery. They were more oft than not left behind on salad bars and strewn to the side of the plate like the family member you wanted to avoid at all cost due to lack of personality. In culinary school we carved them into flowers during garde manger, shaved over salads as an a la minute need for a burst of color. I’ve only ever known them to be the red-headed stepchild of the cruciferous family…tis a shame.

Roasted Radishes : The Salted Table dot com


Roasted Radishes : The Salted Table dot comThe recipe I’m sharing with you today I hope changes your mind about these guys…or gals. I rather enjoy introducing radishes to my clients in this format and I have yet to see anyone shy away from giving them a try. It’s so simple and yet so rewarding-ly delicious – just a little bit of olive oil, kosher salt and fresh ground black and you’re in business. This same method works well with carrots, rutabagas, parsnips and other hearty veggies as well.

You simply give your radishes a little rinse to remove any dirt that may be still hanging around. If your radishes have the greens attached, don’t trash them, simply give them a little rinse as well and saute them with a little salt, pepper and oil for a snack or toss them in your next salad. Place your radishes in a mixing bowl, roughly about two cups worth – that have been rinsed and quartered depending upon their size, you may want to cut them in half if they are the bigger ones. And I know that there is a plethora of radishes out there on the market so use your best judgment on what size you want to cut them. Just make sure that they are uniform so that they cook evenly. So place them in your mixing bowl with two gracious tablespoons of olive oil, 1 teaspoon of kosher salt and a healthy dousing of cracked black pepper. Roast them on 425 for 20-35 minutes, or until the skin begins to wrinkle and you see a little caramelization start to take place on the white flesh. You may want to stir them around with a wooden spatula halfway through cooking. Once they’re finish, let them hang out for a moment or two before you eat them.

Roasted Radishes : The Salted Table dot comI decided to make a little garlic aioli to eat them with and used the cheaters guide to make this rather quickly. I cracked and peeled three cloves of garlic and sautéed it in a skillet with a tablespoon of olive and a little salt and pepper until the garlic was aromatic and began to caramelize a little. Once I got a good amount of color on the garlic about two minutes on medium heat – I set that mixture to the side to let it cool. I pulled out my food processor and put three heavy tablespoons of Duke’s mayo in there with two dashes of Texas Pete hot sauce, a squeeze of lemon juice (1 tbsp), the garlic with the oil that it cooked in and a dash of Worcestershire. I flipped the switch and let those ingredients come together, scraping down the sides once or twice to incorporate all the ingredients. Once I was happy with the consistency I tasted it for salt and pepper.

The rest is history friends, you have your delicious roasted radishes and a delectable condiment to dip or slather them in and all is right in the world. I hope this inspires you to give it a try next time you’re at the grocer or have some hanging out in the fridge.Roasted Radishes : The Salted Table dot com

Grilled Bone-In Ribeye & Garlic Butter Asparagus from America’s Test Kitchen’s Master Of The Grill Cookbook

America's Test Kitchen, Food photography, black chef

I’m not sure why 2016 is in such a rush but it may be causing me to lose track of time. It only seems as though yesterday, I was driving down the highway admiring Spring’s cascade of honeysuckle that laced both sides of the road. It feels like every year, I’m constantly reminding myself to pick honeysuckle to make simple syrup and I never get around to it, but I digress – we’re here to talk grilling.

Why, yes – Summer crept in like a thief in the night and without any apology but I’m not complaining. The Tennessee heat is harassing every brow and back with puddles of perspiration, children are frolicking across freshly mowed lawns and backyards are sending up billowing smoke signal invitations to everyone in the neighborhood. Summer is an open invitation to keep your house cool and your oven in hibernation while the grill carries the load for a while. I’m honored to be partnering with America’s Test Kitchen to share some grilling tips and flawless recipes for your summer entertaining. ATK’s latest addition to their extensive cookbook collection is all about grilling, and it spares no details when it comes to all the tools and knowledge you’ll need to be a Grilling Guru this season.

asparagus, food photography, americas test kitchen, health eating

Grilling, Charcoal, Chimney Starter, ATKgrill

I have a pretty extensive cookbook collection and they all serve one purpose or another, they all have their tips to offer, some, I’m a die-hard believer in and others I take with a grain of salt. But this cookbook, or better yet – ‘guide,’ shall we say, in particular, is pretty much spot on with the techniques and approaches to what I feel is intimidating to the masses.

Americas Test Kitchen, Grilling Food

Ribeye Steak, Recipes, Grilling, Americas Test Kitchen

When I grill I use one-hundred percent all-natural hardwood lump charcoal, I like the flavor it imparts and I’ve used it for so long I couldn’t tell you why I left behind all the other options as it pertains to flavor, but I won’t be changing back anytime soon. I will say that I learned a little something during this process that was never apart of my barbecuing/cookout experiences growing up in East Tennessee. We never used a charcoal chimney – it was simply crumbled up newspaper nestled in the bottom of the grill and the charcoal arranged evenly over the top, a generous squeeze of lighter fluid and dinner was in motion. I must say though, I will never touch lighter fluid again due to my palate still having nightmares about the harsh aftertaste it leaves behind from excessive usage. I prefer the lump charcoal, it burns clean, quick and easy, and the flavor is awesome. But I always encourage everyone to do their research, and find what works for you.

When flipping through the book to find recipes to share with you guys, I wanted to do something different but since whatever I chose to prepare would also be dinner – I went with beef…because beef. I didn’t purchase anything too expensive, I purchased two bone-in ribeye from a local grocer for about twenty-six bucks and a bundle of asparagus for about three bucks. And compared to what we would’ve spent on a steak dinner out, this was a great deal in my book. I cooked the steak to medium but there are instructions in the book to guide you along on how to cook the meat to your preferred temperature. Remember, thermometers are always your best friend when cooking meat, or really most things in the kitchen!

Americas Test Kitchen, Steak Recipes, Grilling

I’ve been reading this book on and off for the last three weeks and I’m amazed at all the info that is crammed into roughly 430 pages, everything you ever wanted to know about seasoning, proper tools, recipe tricks, and more that will definitely equip to you to be a master of the grill. I hope you guys enjoy these two recipes as much as I did. The steak was so full of flavor and juicy, and the asparagus was a garlic-y, buttery dream with a little char for intrigue. Trust me when i say this won’t be just another book that collects dust on the shelf, you can purchase the book here. Cheers to grilling perfection!

Americas Test Kitchen

The Ultimate Steak
2 (1 1/4-to 1 1/2 pound) double-cut bone-in ribeye steaks, 1 3/4 to 2 inches thick, trimmed
4 teaspoons kosher salt
2 teaspoons vegetable oil
2 teaspoons pepper

1. Set wire rack in rimmed baking sheet. Pat steaks dry with paper towels and sprinkle all over with salt. Place steaks on prepared rack and let stand at room temperature until meat registers 55 degrees, about 1 hour. Rub steaks with oil and sprinkle with pepper.

2A. FOR A CHARCOAL GRILL Open bottom vent half-way. Arrange 4-quarts unlit charcoal briquettes even layer over half of grill. Light large chimney starter one-third filled with charcoal briquettes(2 quarts). When top coals are partially covered with ash, pour evenly over unlit coals. Set cooking gratin place, cover, and open lid vent halfway. Heat grill until hot, about 5 minutes.

2B. FOR A GAS GRILL Turn all burners high, cover, and heat grill until hot, about 15 minutes. Turn primary burner to medium-low and turn off other burner(s). (Adjust primary burner as needed to maintain grill temperature around 300 degrees.)

3. Clean and oil cooking grate. Place steaks on cooler side of the grill with bones facing fire. Cover and cook until steaks register 75 degrees, 10 to 20 minutes. Flip steaks, keeping the bones facing fire. Cover and continue to cook until steaks register 95 degrees, 10 to 20 minutes.

4. If using charcoal, slide steaks to hotter side of grill. If using gas, remove steaks from the grill, turn primary burner to high, and heat until hot, about 5 minutes; place steaks over primary burner. Cover and cook until well browned and steaks register 120 to 125 degrees (for medium-rare) about 4-minutes per side. Transfer steaks to a clean wire rack set in rimmed baking sheet, tent with aluminum foil, and let rest for 15-minutes. Transfer steaks to carving board, meat from bone, and slice into 1/2-inch-thick slices. Serve.

Grilled Asparagus

Serves 4 to 6
Use asparagus that is at least 1/2 inch thick near the base. Do not use pencil-thin asparagus; it can not withstand the heat and will overcook. Age affects the of asparagus enormously. For the sweetest taste, look for spears that bright green and firm, with tightly closed tips.

1 1/2 pounds thick asparagus spears, trimmed
3 tablespoons unsalted butter, melted
3 minced garlic cloves
Salt and pepper

1A FOR A CHARCOAL GRILL Open bottom vent completely. Light large chimney starter three-quarters filled with charcoal briquettes (4 1/2 quarts). When top coals are partially covered with ash, pour evenly over grill. Set cooking grate in place, cover, and open lid vent completely. Heat grill until hot, about 5 minutes.

1B FOR A GAS GRILL Turn all burners high, cover, and heat grill until hot, about 15 minutes. Turn all burners to medium-high.

2 Brush asparagus with melted butter and season with salt and pepper.

3 Clean and oil cooking grate. Place asparagus in even layer on grill and until just tender and browned, 4-10 minutes, turning halfway through cooking. Transfer asparagus to platter and serve.

This post was written in partnership with America’ Test Kitchen. All thoughts and opinions are mine.Master Of The Grill


Cast-Iron Skillet Chipotle Chili

Cast-Iron Chipotle Chili  
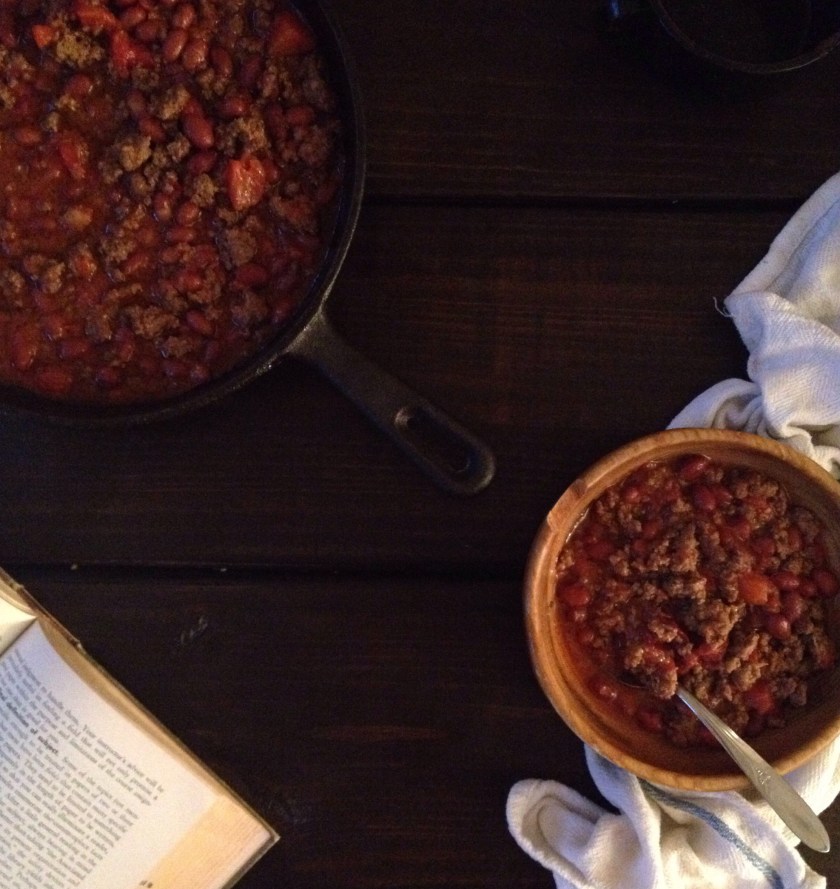
We could go around in circles discussing whether or not ‘real chili’ has beans in it or not. But I’m simply going to shut down that discussion because I’ve never known chili to ‘not have’ beans in it until I saw something about it on a cooking show, and all the Texans were giving the rest of us ‘bean in our chili’ eaters the “thumbs down”. And that’s ok…we forgive them!
In my book chili is an all year around meal because you can dress it up or dress it down according to the season. In the Spring, maybe you want a chili chock-full of full of fresh vegetables, and in the Summer maybe you desire something like a white chicken chili in a light broth. But it is indeed, undisputed that when the breeze begins to roll in from the hills and those leaves begin to burst into shades of burnt orange, cranberry and coffee — I want all the beef and canned tomato goodness with a kiss of peppery heat that one can stand, to fill my bowl to the brim. And this recipe gives you nothing less than that.Cast-Iron Chipotle Chili : The Salted Table
This recipe is also great for the adventurer within, so maybe you want to have a campfire in the backyard and invite a few friends or hang with the kids, maybe there’s a camping trip in your near future? This is the chili you’re gonna want for those “chili” nights in the wilderness.

You may be wondering why this chili isn’t smothered in avocado, sour cream, cheese and onions. If you are a lover of toppings then feel free because this chili may need to be cooled down if you’re sensitive to heat but I tend to be a purest if something’s made well and this chili is pretty darn perfect! So grab a warm blanket and eat a bowl…or two for me.The Salted Table Food Blog, The Salted Table, Nashville TN, Nashville Food Bloggers, Chefs, Personal Chef, Food Photography, Food Styling

Cast-Iron Skillet Chipotle Chili

1 lb 80/20 ground beef
3 Tablespoons Chipotle Chilies in Adobo (diced)
2 14.5 oz cans Red Beans
2 14.5 oz cans diced tomatoes
3 Heavy Tablespoons Chili Powder
2 Tablespoons Ground Cumin
1 teaspoon granulated garlic
1 Tablespoon Kosher Salt (to taste)

Method
1. Place your cast-iron over medium-high heat. Add your ground beef and crumble with a wooden spoon. Stir occasionally, breaking down the chunks of beef until meat is fully browned/cooked. Allow the liquid from your beef to reduce by half then, add your chipotle chiles, chili powder, ground cumin, granulated garlic, and salt. Stir until spice are incorporated into the beef but be careful not to burn, you may need to turn down your heat.

2. Drain excess liquid from your beans and add them to the beef along with your tomatoes. While occasionally stirring, you’re going to allow this to cook for about 20-30 minutes until the liquid begins to thicken and you have a hearty looking chili. Then you can taste to see if you need to add anymore seasoning.Cast-Iron Skillet Chipotle Chili, Quick Chili Recipes, Cooking, Dinner, Camping Food, Autumn Chili, Autumn Foods, Nashville TN, Food Photography

Notes:

Using dry beans: If you opt to use dry beans, simply soak them in luke warm water the night before you prepare the chili, this will cut down you’re cooking time though the beans will still need to be boiled off before allowing to cook in a cast-iron skillet.Cast-Iron Skillet Chipotle Chili


Summer Tomato, Tart Cherry & Squash Salad

The Asheville Wine & Food Festival & A Summer Tomato, Tart Cherry with Squash Salad

The Asheville Wine & Food Festival is right around the corner and my anticipation has reached a new level of out of control! Our Airbnb is booked and I won’t even begin to spill all the goodness about the cozy-decor-ed little apartment we scored! There’s just something about being in Asheville that makes you wonder why you haven’t been there all along, but don’t worry Nashville, I’m not leaving you! In anticipation for the food-coma of a festival I’ve whipped you up a vegetarian salad that will put a smile on your heart and keep you true to that summer diet. And revel in it guys because vegetarian options are a rarity here folks!

It seems like yesterday, my eyes were rolling into the back of my head and my arms were making a swift motion to push the plate across the table. Oh, you ask, “What was on that plate?” Well, if you were a resident of the blue home on Houston Avenue it may have been anything from buttered peas and onions to turnips or rutabagas, either way I wanted no part of it. But I was young and naive to the joy that these spring time and autumnal veggies had to offer. I only knew or at least thought I knew that they were healthy and weren’t worth another look, pass the mac and cheese please (wink).

IMG_1377

My mom cooked vegetables often and I’m not even sure if she loved them or if it was just something innate from her childhood. Because often you would arrive to my grandmother’s house and there would only be a pot of stewed vegetables on the stove and a cast-iron skillet of cornbread. And I had become accustomed to this tradition and over time it became a treat, as my palate matured and all those vegetables slowly began to take on their own definitive taste in my mind. It wasn’t as simple as ‘if you’ve tried one of them, you’ve tried them all’ which I lived by this mantra back then.

And now vegetables of all kinds arouse the epicurean within me and I want to know all the ways to use them. How other cultures enjoy from day-to-day; season to season, and what kinds exist that I’ve yet to discover? The Nashville farmer’s markets are flooded with all kinds of summer goods from the soils bountiful harvest and I can’t resist leaving the market with a bag full of them to explore. I’ve been pickling, jamming and tossing all the things in vinaigrettes and it won’t cease anytime soon. I’m enamored with the color varieties that vegetables come in even if the flavor doesn’t change, it keeps that dinner plate interesting and makes for beautiful presentation.

The recipe for this salad is relatively easy, you’ll have to put a little time in but the end product is well worth it. And squash has been killer this summer, so much so, that it has ended up in many a dish for dinner. The combination of these tart cherries, earthy sweet tomatoes and the burst of brightness from the lemon vinaigrette work so well with the zesty pop of the onions. I think you’ll be making this for summers to come…if you’re smart. Also, if you want more info on the Asheville Wine & Food Festival simply click here! I’d love to see you there!

Summer Tomato, Tart Cherry & Squash Salad

2 Summer Squash
1/2 cup pitted & sliced cherries (tart)
1/4 cup julienne red onion
3 Tomatoes

Lemon-Honey Vinaigrette

1 medium lemon (zested & squeezed)
2 tablespoons TRU Bee Honey
3 tablespoons apple cider vinegar
1/4 Extra Virgin Olive Oil
1 tsp kosher salt (to taste)

Method

First, rinse all of your fruit off under cold water for about thirty seconds to remove all debris. Julienne one-quarter of a red onion, put it in an ice-cold bath for about 5 minutes. I do this to remove the sharp bite that onions may have. Take them out, lightly pat them with napkins to remove excess water. Shave your summer squash with a potato peeler or a mandolin, place in a bowl with onions. Core and slice your tomatoes into thin wedges or you may dice them if you like. Then, add them to the onions and squash, set aside.

Combine all of the ingredients for your lemon-honey vinaigrette and whisk them vigorously in a small bowl until a temporary emulsion forms. Taste for salt and adjust accordingly. Drizzle the vinaigrette over the squash, onions, and tomatoes and toss gently with your ‘clean’ hands for about 30 seconds or so. Taste again for salt and adjust accordingly. Arrange salad on the serving platter or plates how you see fit and last, but not least, place the cherries across the top. Enjoy!

Note: I also think sherry or rice wine vinegar would be a great substitute if you don’t have apple cider vin on hand, but you may need to add a little sugar (like a teaspoon) if using rice wine vinegar. This salad would also be nice with seared duck breasts or grilled salmon if you’re feeling fancy!


Oven Roasted Tomatoes & A Sweet Adieu.

ovenroastedtomatoescover.1I woke up this morning in our recently purchased home and decided to stop making excuses as to why I’m too busy to sit down and blog–because truth be told, I’m not. Though I do feel overwhelmed at times and all I want to do once I arrive home from work is wander aimlessly in my boxer shorts, turn the A/C down to some unbearable icy temperature and watch Netflix, it doesn’t make for the most efficient use of my time, but it’s what often happens.

Time is a precious thing and to squander it on frivolous things often convicts this ol’ heart.  Not to mention, home-ownership requires more discipline than I ever thought I’d need to exhibit since being forced to stay in my seat during elementary arithmetic. I actually have to live with greater intent to accomplish tasks by specific times, times I didn’t have to allot for with apartment living. The summer has been good to us. We found our new home after a long and tedious search. I can’t tell you the number of times my wife didn’t even get out of the car upon arrival to some potential residence, quite comical. But many disputes over more land, less land, more kitchen, less dining room have led us to our new home and we are elated. It’s not quite photo-shoot ready but I’ll slip you a few shots of our sacred space in the near future.

I’m rather in love with the natural lighting in my kitchen and if the truth be told–my whole kitchen would be made of windows if I could have my. My cooking space has quadrupled from that of our apartment where the kitchen was an afterthought but the dining and living room conquered all. Any-who, we feel blessed and overwhelmed with gratitude for what we believe was a gift from God after months of searching and losing homes to higher bids and ridiculous inspections.oven roasted tomatoes.2

oven roasted tomatoes.3
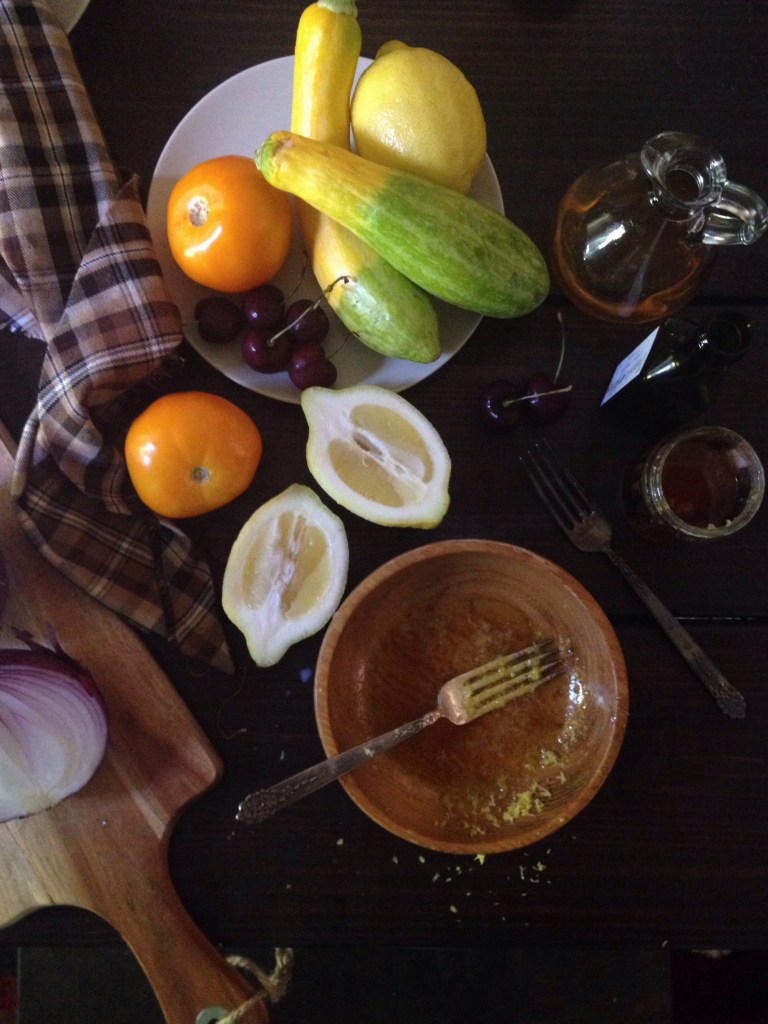
I love the summer time. I love the warm weather, seeing people riding their bikes, families spending time together in backyards, and the smell of smoky meat funneling through your window. It evokes the free-spirit in all of us and we’re off to the lake on the weekend, mini road-trips pursue and we’re tending to our gardens on the patio. Just about every Summer I’m left feeling convicted that I didn’t quite enjoy it enough. I didn’t eat enough tomatoes, there’s not enough squash in my freezer and I didn’t can anything. I’m still dealing with that aching feeling this year but trying not to let it ruin taking advantage of  Autumn’s produce, I do love some root vegetables, figs, apples, winter squash and greens.oven roasted tomatoes.1

This recipe for oven-rooasted tomatoes is as simple as it gets and there is still time for some of you to gather from the summer’s harvest to make these. And if not, the recipe works just as well with slightly out of season tomatoes from your local grocer. The roasting process helps to concentrate the sugar so that tomato-y flavor is amplified and leaves you with this sweet, chewy little piece of ‘summer candy’ you won’t regret making.oven roasted tomatoes.7oven roasted tomatoes.8

I’m simply going to walk you through this recipe because it is so simple that it hurts. First, preheat your oven to 325 degrees. I had two pints of grape tomatoes, Sungolds and heirloom Cherokee purples I got from the Franklin Farmer’s Market and some from Maxwell’s Produce on Nolensville Pike. I rinsed them off under cold water and patted them dry with a kitchen towel but paper towels will work just fine. Then, cut the larger ones in half and leave the smaller ones whole. I like the contrast of some juicy and some dryer. I generously coated them with about a quarter of a cup of evoo, two-teaspoons of kosher salt and a few grinds of fresh black pepper. Place the tomatoes on an ungreased sheet pan  and cook for three and a half hours or until the desired shriveled-ness is reached, you be the judge. Once tomatoes are done, allow them to cool and I stored them in my Weck Jars because I’m pretty much addicted to the aesthetic of their containers. This recipe also works fantastic with grapes and figs, though cooking times can be scaled back to about one hour and a half to two hours. And I want to hear how you used to tomatoes this Summer, so prey-tell?

What to do with them?

I’m guilty of eating a quarter of the tray once they came out of the oven. Some of the ones around the edge of the pan get really dry and crunchy and they have little bits of clumped pepper and salt. Those drive me crazy because their so good and barely make it into another recipe. But I have been using them in pastas which you will see if you follow on Instagram, as well as salads or just as a snack on bread and butter. I’m sure you’ll find your own creative use but I hope this helps! Bon Apetit!