Chocolate Mint Simple Syrup

9f3e5f55-6bb3-4013-b93c-172390ed8eda

I woke up and lied in bed staring into the ceiling as if it would begin moving like clouds before the rain. I changed my position several times allowing my limbs to find the areas of the sheets that still had just a little chill left. I could hear my neighbor cranking up his F 450 and I was reminded that it was Saturday, the rumble always seemed to beat my alarm clock by minutes, in the annoying way that nature calls moments before your appearance is requested at scheduled event.

I swept the gray elephant laced duvet and comforter back, my wife still curled in the sheets, I placed my bare feet on the cold wood floor. The golden light had begun to make its way through the bathroom blinds, the way it does every morning during the six o’ clock hour. Sometimes I lie and stare into it for several minutes, and it often seems like hours, until the light begins to shift. My mind consumed with what the day will bring, and I begin to anticipate whether or not I will accomplish everything I want to do within the allotted hours. Check lists have never been ‘my thing.’ I like the sound of organization but when it comes down to it – executing the things I set before myself often feels like an interminable task. I was proud of myself for getting my herbs planted this year because last year wasn’t that successful. And my basil died a slow death, and yes, I’m ashamed, but I digress.

chocolate mint simple syrup, bartender recipe, simple syrup, nashville tn, personal chef, caterer, easy recipes

chocolate mint, simple syrup, nielsen-massey chocolate extract, bartender recipes

Chocolate Mint Simple Syrup, Nashville TN, Chocolate, Easy Bartender Recipes, Cocktail Mixers, Mint Tea RecipesI’ve been watering my mint for a few months now and I could never seem to find the time to make the simple syrup, despite the fact that the mint was simply thirty footsteps or so away. I’m working on it friends, everyday presents me with the opportunity to be better than the day before. But nonetheless, here is your recipe and its the desire of my heart that this syrup will make its way into your evening tea, top off your backyard cocktails, be drizzled over that ice cream nightcap or just a shot in your morning coffee. I hope that was enough inspiration to pause Netflix and get to work! Let me know your latest herb concoction in the comments or how would use this recipe to bring some joy to your life?

Chocolate Mint Simple Syrup

1 cup granulated sugar
1 cup filtered warm water (tap if you must)
1/2 ounce chocolate mint (rinsed, stems & all)
1 tablespoon Nielsen-Massey Chocolate Extract
smidgen of kosher salt

Method

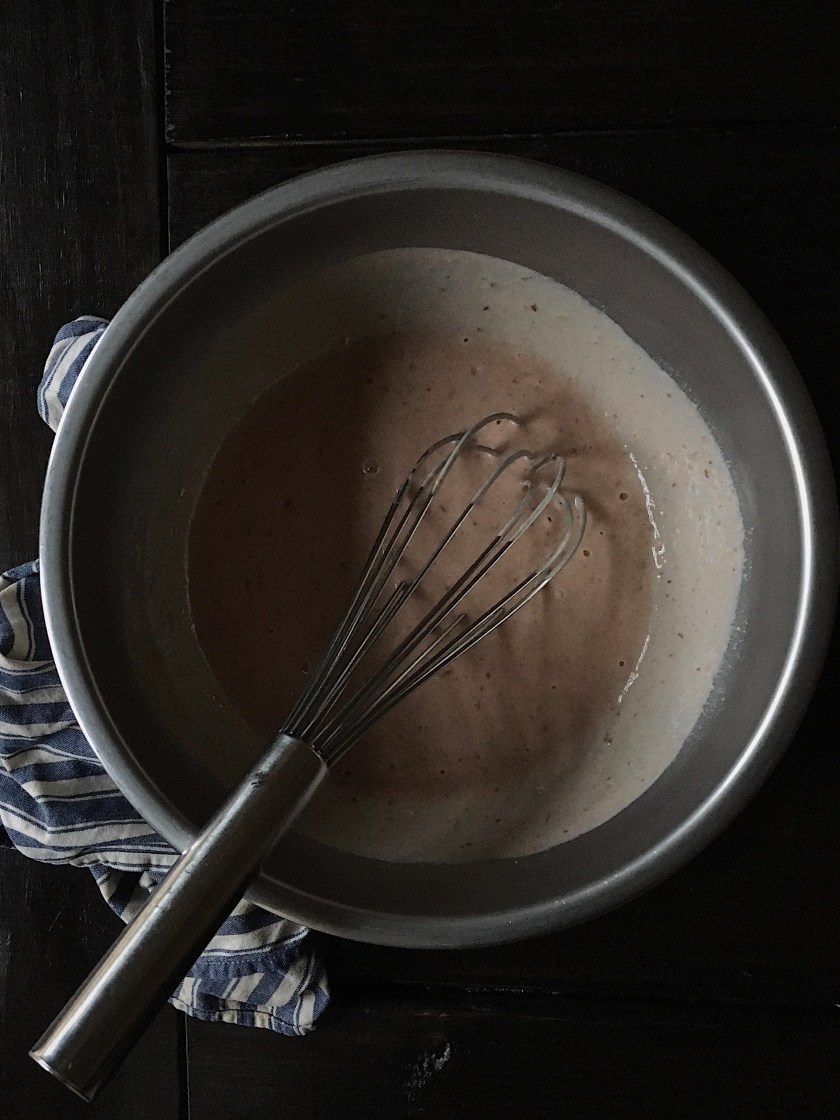
1. Over medium heat, combine the sugar, salt and water, whisk together until most of the sugar dissolves. Add the rinsed mint with stems and leaves, you may chop it up if you like, but not necessary.

2. Bring syrup to a simmer for about 6 minutes or so, remove it from the heat, stir in chocolate extract and allow it to come to room temperature before storing it. I didn’t have some ‘cool bottle’ to put it so I sprung for one of favorite storage vessels, my Weck jars. Order them here.

Note: I stored this simple syrup at room temp in a cool place (but not the fridge) for two weeks and it kept beautifully. Also, try a little bit of this in your Mint Julep for a new twist!

Chocolate Mint Recipes, Chocolate Mint, Simple Syrup, Cocktail Recipes, Nashville TN

SaveSave

SaveSave

SaveSave

SaveSave

SaveSave

SaveSave

SaveSave

Roasted Grape Vinaigrette

9ffe7642-92f6-47a7-844e-35d4a48d0a1a

I hated grapes as a kid but I made an exception for them if they were peeled. Yes, I was that kid and it still pertains to some tannic skinned fruits today. I also didn’t like the seeds which just made me all kinds of high maintenance for my mom when trying to get me to eat them – whether it be an afternoon snack or snook into my Marvel comic laced lunch box.5b9e1356-8d89-4234-978c-d4cf317d2f31

aac18d07-cd28-4cbb-970a-25da0a8e3c62And then when I was around 6 or 7, I’m not sure, we found out that I was allergic to everything that bloomed or breathed in nature. It was a rough life as a kid but it was a good life nonetheless, once you find out all the things you’re allergic to, you simply calculate your next move, like chess, and carry-on. There were moments when I’d reach for something and forget to read the label, a few arm scratches later and all my senses were aroused and I was scrambling for Benadryl and a puff of my inhaler. Yes, allergies and asthma is no fun as an energetic youth who had a passion for life the way I did. But I survived and I’m here to tell you all about it.

These days my allergies have somewhat tamed down. I no longer require a weekly visit to get allergy shots and I am able to eat half of the foods I used to be allergic to. So I occasionally enjoy a handful of grapes as long as they’re washed thoroughly – because I learned that with some of my allergies it was about the tree or vine that the fruit itself grew on…interesting huh?3fa33a5e-400a-4597-8750-3ea5fef82c62

I later learned that it was called OAS, Oral Allergy Syndrome, and it happens when one eats  raw or uncooked fruit. You can read more about it here. Once I discovered that it had a name, life became a little bit easier and I was like give me all the fruit pie I can stand! And one frustrating thing about the allergy is that I didn’t always have symptoms – it happened when I was about 7 or 8 years of age. And till this day, there are those days where I all I long for is a juicy peach or sweet gala apple to be devoured in the palm of my hand.

I won’t even tell you about how heartbroken I was when tomatoes got thrown in to the mix…le sigh. Any who, I’m done depressing you about my allergy problems, let’s get to the roasted grape vinaigrette. I really hope you all will give this a try. It’s really delicious and I believe that it would be great on/in a variety of things from salads, wraps to your yogurt bowl (yes, your yogurt bowl).2de95a07-f590-422b-8f58-8bb9f9e19256

679763d4-513d-4e0b-b867-60be30b6b03d

Roasted Grape Vinaigrette

1.5-2 lbs seedless grapes
1/3 cup red wine vinegar
2 tablespoons granulated sugar (optional)
1/2 cup vegetable oil
1 tsp kosher salt (to taste)

Method

1.Preheat your oven to 400 degrees. Remove your grapes from the vine, rinse them thoroughly and pat them dry. Place them in a bowl and toss them in 1 tablespoon oil, and sprinkle a about a teaspoon of salt making sure that everything is coated evenly. Pour onto a sheet pan and roast for about 16-20 minutes, or until skin begins to wrinkle and juices begin to caramelize on the pan. I used my Williams-Sonoma Gold Touch non-stick pan for easy clean up.

2. Once the grapes are room temp or completely cooled, transfer them into a blender with the oil and puree until smooth. There is no need to stream in your oil. Scrape down the sides and once your puree is nice and smooth, add your vinegar, sugar and a little salt as you go until it is seasoned to your liking.

3. Transfer your vinaigrette to an airtight container and keep it in your fridge, it will keep a little over a week if you let it last that long.

d7e6cced-f538-459b-875c-a49fb8427d93

fac5cbd0-958f-4257-ac54-c00cca1f4c7c

Cast-Iron Skillet Chipotle Chili

Cast-Iron Chipotle Chili  
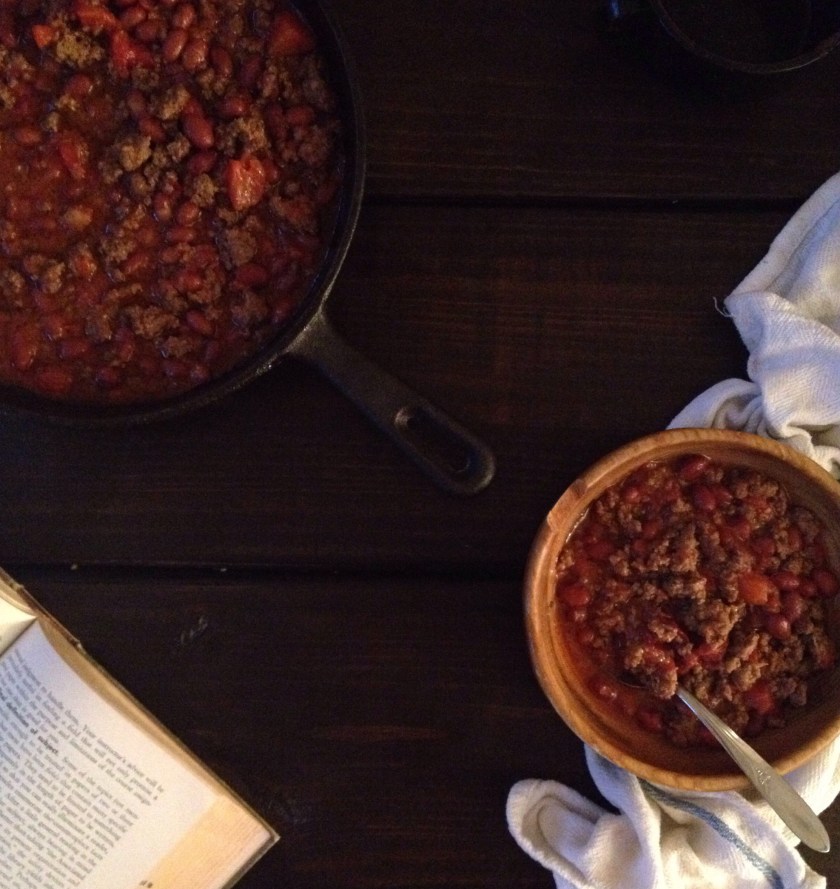
We could go around in circles discussing whether or not ‘real chili’ has beans in it or not. But I’m simply going to shut down that discussion because I’ve never known chili to ‘not have’ beans in it until I saw something about it on a cooking show, and all the Texans were giving the rest of us ‘bean in our chili’ eaters the “thumbs down”. And that’s ok…we forgive them!
In my book chili is an all year around meal because you can dress it up or dress it down according to the season. In the Spring, maybe you want a chili chock-full of full of fresh vegetables, and in the Summer maybe you desire something like a white chicken chili in a light broth. But it is indeed, undisputed that when the breeze begins to roll in from the hills and those leaves begin to burst into shades of burnt orange, cranberry and coffee — I want all the beef and canned tomato goodness with a kiss of peppery heat that one can stand, to fill my bowl to the brim. And this recipe gives you nothing less than that.Cast-Iron Chipotle Chili : The Salted Table
This recipe is also great for the adventurer within, so maybe you want to have a campfire in the backyard and invite a few friends or hang with the kids, maybe there’s a camping trip in your near future? This is the chili you’re gonna want for those “chili” nights in the wilderness.

You may be wondering why this chili isn’t smothered in avocado, sour cream, cheese and onions. If you are a lover of toppings then feel free because this chili may need to be cooled down if you’re sensitive to heat but I tend to be a purest if something’s made well and this chili is pretty darn perfect! So grab a warm blanket and eat a bowl…or two for me.The Salted Table Food Blog, The Salted Table, Nashville TN, Nashville Food Bloggers, Chefs, Personal Chef, Food Photography, Food Styling

Cast-Iron Skillet Chipotle Chili

1 lb 80/20 ground beef
3 Tablespoons Chipotle Chilies in Adobo (diced)
2 14.5 oz cans Red Beans
2 14.5 oz cans diced tomatoes
3 Heavy Tablespoons Chili Powder
2 Tablespoons Ground Cumin
1 teaspoon granulated garlic
1 Tablespoon Kosher Salt (to taste)

Method
1. Place your cast-iron over medium-high heat. Add your ground beef and crumble with a wooden spoon. Stir occasionally, breaking down the chunks of beef until meat is fully browned/cooked. Allow the liquid from your beef to reduce by half then, add your chipotle chiles, chili powder, ground cumin, granulated garlic, and salt. Stir until spice are incorporated into the beef but be careful not to burn, you may need to turn down your heat.

2. Drain excess liquid from your beans and add them to the beef along with your tomatoes. While occasionally stirring, you’re going to allow this to cook for about 20-30 minutes until the liquid begins to thicken and you have a hearty looking chili. Then you can taste to see if you need to add anymore seasoning.Cast-Iron Skillet Chipotle Chili, Quick Chili Recipes, Cooking, Dinner, Camping Food, Autumn Chili, Autumn Foods, Nashville TN, Food Photography

Notes:

Using dry beans: If you opt to use dry beans, simply soak them in luke warm water the night before you prepare the chili, this will cut down you’re cooking time though the beans will still need to be boiled off before allowing to cook in a cast-iron skillet.Cast-Iron Skillet Chipotle Chili


Chocolate Overload S’mores Cheesecake

Chocolate Overload S'mores Cheesecake Chocolate Overload S'mores Cheesecake

I remember my sister and I sitting on the back porch tearing yesterday’s newspaper into small ragged pieces and placing them into an empty can. Probably one of my grandmother’s #Folgers cans, you know the red one with the plastic lid? We used those as vessels to fulfill our need for the melty gooey, chocolatey goodness that would soon tangle our fingers in a web of mallowy strands and #cocoa smear. If I had to choose a house that I missed, it was this house with the huge backyard where we often watched the deer drink from the pond and the trees overflow with black walnuts, pears and apples. We were young and naive and had no real appreciation for the seasonal jewels that rolled across the forest floor. I mean, we ate the occasional fruit and cracked a few nuts now and again but nothing too serious. I remember seeing our next door neighbor gathering the nuts in the evening to crack for an evening snack.

Chocolate Overload S'mores Cheesecake

If I had the passion for food I have now back then, I imagine that I would’ve encouraged the making of pies, tarts, jams and jellies, but those are merely the wishes of a time gone. And we all know that living in the past can prove to be a detriment to one’s growth; no one wants that…do they? S’mores are the ‘cream of the crop’ when it comes to nostalgic childhood treats. The simplicity of those three ingredients combined have the capability to solve life’s conundrums, sartorial – political or otherwise. There may be a little embellishment in there but work with me folks, we’re talkin’ #smores.

I know that with the arrival of #Pinterest and food bloggers appearing by the dozen every hour — these once sacred treats are always getting a new makeover from pie-pops to #cake but I warn you, steer clear, it’s a trap and you won’t be happy. What I’m giving you today is an all year round invitation to the snack once cornered to Autumnal nights and snow-capped backdrops. We should be able to indulge in all of this goodness any time the mood awakes within us and be able to do so without checking the weather report. Lord knows, it won’t be correct anyway. The time is winding down and as you know I am collaborating with the fine folks of the Asheville Wine & Food Festival to bring you some delicious food posts in anticipation for the event.

I can’t begin to tell you how full my heart is full knowing that we are only a few weeks away from that Blue Ridge Mountains seduction. We found the perfect place to stay in walking distance to coffee shops and you know how I love the beans. We’re plotting out all our favorite places to dine as if we won’t be eating enough AVL goodness between the SWEET Event and The Grand Tasting! If you haven’t made plans to attend, there’s still time and you won’t want to miss it! You can purchase tickets for the SWEET Event on August 21 here and tickets for The Grand Tasting on August 22 here! In the meantime, enjoy this recipe for one of your favorite childhood treats and steer clear of all those other impostors (wink).

IMG_1544-0 Chocolate Overload S'mores Cheesecake

Chocolate Overload S’mores Cheesecake

Crust… 2 cups Crushed Graham Cracker
3 Tablespoons Granulated White Sugar
1/4 Teaspoon Kosher Salt
6 Tablespoons Unsalted Butter (slightly melted)

Filling…
2-8 ounce pkgs Philadelphia Cream Cheese
1/3 Granulated White Sugar
1 Teaspoon of Nielsen Massey Bourbon Vanilla
2 Large Eggs 1/2 Teaspoon of Kosher Salt
1/2 Cup Semi-Sweet Chocolate Chips

Topping…
6.2 ounces of Hershey’s Chocolate (4 1.55 oz bars)
2 Tablespoons vegetable oil
2 Cups Miniature Marshmallows

Method

First, preheat your oven to 350 degrees. Put your butter in the microwave for about 30 seconds or until mostly melted but not hot. Mix together your graham crackers, granulated sugar, salt and butter until you can squeeze the mixture in your hand and form clumps. You may need a little more butter depending upon the dryness of your grahams. Place the mixture in the bottom of an ungreased cake pan, square or circle, it doesn’t really matter. Evenly pat down the crumbs until no holes remain. If you have a pan slightly smaller and the same size I would use it smash it down evenly. Smash…giggle. Bake in the oven for ten minutes, remove and allow to cool. Reduce oven temp to 325 degrees for your filling.

Place your cream cheese into a standing mixer with the sugar, vanilla and salt. Let the mixture whip on medium speed for two minutes, add the eggs one at a time until fully incorporated. Fold in the chocolate chips with a spatula and then evenly distribute the filling over your cooled crust. Surround the bottom of your pan with aluminum foil. you will probably need to pieces to criss cross the bottom of the pan and create a boat for the cheesecake, be gentile. Place this into a larger baking pan and fill the surrounding area with warm water about 1/2 way up the side. Place the entire thing into the oven slowly as to avoid splashing water into the cheesecake. Let cook for 90 minutes or until a knife inserted in the center comes out clean. Once cheesecake is done, allow it to set in the water for 30 minutes and I noticed that the top didn’t crack like the last time I made it and removed it immediately once cooked. Give it a try! Allow to cool overnight or for at least 90 minutes.

Then, take your chocolate and rough chop it, place it in a microwaveable bowl with your vegetable oil. Heat it in the microwave for 20 second intervals until chocolate is completely melted. Be careful not to overcook your chocolate, this will give you nasty sugar crystals (not cool). Pour it over the graham cracker crust, place it in the fridge and let it cool for 15-20 minutes.

Turn on the broiler, if you have a temperature option I typically use HI and watch the marshmallows like a hawk. Let your oven come up to temp. Evenly distribute the marshmallows over the chocolate, try not to leave any exposed chocolate and more marshmallows never hurt anybody. Place the pan on the high rack , tell the kids to step back. You should be squatting with the oven door open watching your marshmallows get nice and toasty right before they burn. Though this is totally subjective on how much crunch and torchy marsh you like, I like a lot! You may need a towel at hand to slightly rotate your dish to get even torch (no marsh left behind, ask Bush) on your marshmallows. Once your topping has the right color that you prefer, allow it to cool for 30 minutes before cutting into it. You will want to run a sharp knife under hot water if you desire perty slices.

I hope you and the family enjoy this recipe, I mean s’mores all year round, you’re winning! Chocolate Overload S'mores Cheesecake

Torched Marshmallow Pumpkin Pie with Olive & Sinclair Chocolate

Torched Marshmallow Pumpkin Pie with Olive & Sinclair ChocolateI feel as though the holidays snook in the back door on me this year. There I was mowing the grass and lounging at farmer’s market sorting through summer’s harvest and before I knew it, it was time for windbreaker’s and flu shots. But nonetheless, I love the holiday season and the first sighting of fiery leaves are an indication of warm family gatherings, the crackling of fire places and bottomless eggnog and hot chocolate. Check!

If you’ve been following along with me here at The Local Forkful long enough, then you know I’m a believer in eating dessert first, no shame necessary, because my sweet tooth is insatiable and we won’t discuss my gummy candy addiction, at least not in this post. Today, I made you a dessert that embodies the spirit of the holiday season to me–I mean, chocolate, pumpkin, graham cracker and marshmallows…how can we go wrong? (we can’t.) So dive head first into this delicious little holiday pie infused with some Olive & Sinclair goodness!

Torched Marshmallow Pumpkin Pie with Olive & Sinclair Chocolate

Thanksgiving is all about family, friends and delicious food. Luckily, the food blogging community is all about these things as well. To celebrate the holiday, Meghan from Cake ‘n’ Knife and Susannah from Feast + West are hosting Blogsgiving Dinner. There are 20 awesome blogs sharing 52 recipes

The idea is based on the old-fashioned progressive dinner party, in which you’d eat each course at a different guest’s home. Each blogger is bringing one or more dishes to the party on Monday, Wednesday and Friday of this week, so be sure to stop by each one and get some ideas for your own Thanksgiving meal. Be sure to check out today’s recipes for entrees, salads and side dishes.

We’ll be posting to social media with the hashtag #blogsgivingdinner. Hope you can join us!Blogsgiving Dinner 2014

Torched Marshmallow Pumpkin Pie with Olive & Sinclair Chocolate

2 cups roasted pumpkin or squash (pureed
1/2 cup packed dark brown sugar
1 tbsp. cornstarch
2 tsp. ground cinnamon
2 tsp. ground ginger
½ tsp. freshly grated nutmeg
smidge of kosher salt
2 eggs (room temperature)
2 tsp. Nielsen Massey Vanilla
1 cup miniature marshmallows

Temper Chocolate

1.5 ounces %67 Olive & Sinclair Chocolate
1 tsp. vegetable oil

Graham Cracker Crusts

1 1/2 cups crushed graham cracker
3 tbsp. AP flour
2 tbsp. granulated sugar
2 ounces unsalted butter (melted)
smidge of kosher salt

method

1. Using your fingers, combine graham cracker, flour, salt, sugar together and add butter one tablespoon at a time until mixture holds ball form when squeezed, set aside. Meanwhile, whisk together salt, pumpkin, sugar, cornstarch, cinnamon, ginger, nutmeg, vanilla and eggs in a bowl until smooth; set aside.

2. bring a small pot of water to a rolling simmer. chop the chocolate up and place it into a non-reactive metal bowl with the oil. stir chocolate with wooden/plastic spatula until chocolate is smooth, remove from heat and set aside.Do not leave unattended.

3. Heat oven to 375°. Place 3 tbsp of crust mixture into the bottom of a cupcake pan and using your fingers press the mixture around the sides and leave a pool in the center to pour the pie mixture into.Pour filling into crust; drop a dollop of chocolate into the center and swirl a toothpick around to create a design, bake until a toothpick comes out clean when inserted into the middle, but avoid piercing an area with chocolate. about 20 minutes.

4. Turn your oven on low broil or whip out your blow torch and go to town. While waiting for the oven to come up to temp, strategically place marshmallows on the top of the mini pies. Place under broiler with the door cracked and wait, do not walk away from the pies, once they are a light brown, remove and let cool to room temperature before serving. And I always recommend a scoop of ice cream.


Here is the rest of today’s menu. Go check out what the other bloggers are providing for your holiday feast!

Dessert

Grandma’s Pecan Pie from The Wetherills Say I Do

Pumpkin Sheet Cake with Pumpkin Cream Cheese Frosting from My Cooking Spot

Gluten-Free Apple Berry Crumble from Twin Stripe

Paleo Pumpkin Pudding from Wit Wisdom Food

Cranberry Almond Coconut Bars from Love & Flour

Torched Marshmallow Pumpkin Pie with Olive & Sinclair Chocolate from The Local Forkful

Poached Pears with Salted Maple Caramel Syrup from Home at Six

Sweet Potato Pie from Think Fruitful

Nutella Pumpkin S’mores Tart from bethcakes

Gluten-Free Acorn Squash Spice Bars from I Cook. I Eat. It’s Life.

Drunken Pecan Pie Bars from The Speckled Palate

Torched Marshmallow Pumpkin Pie with Olive & Sinclair Chocolate