Grilled Bone-In Ribeye & Garlic Butter Asparagus from America’s Test Kitchen’s Master Of The Grill Cookbook

America's Test Kitchen, Food photography, black chef

I’m not sure why 2016 is in such a rush but it may be causing me to lose track of time. It only seems as though yesterday, I was driving down the highway admiring Spring’s cascade of honeysuckle that laced both sides of the road. It feels like every year, I’m constantly reminding myself to pick honeysuckle to make simple syrup and I never get around to it, but I digress – we’re here to talk grilling.

Why, yes – Summer crept in like a thief in the night and without any apology but I’m not complaining. The Tennessee heat is harassing every brow and back with puddles of perspiration, children are frolicking across freshly mowed lawns and backyards are sending up billowing smoke signal invitations to everyone in the neighborhood. Summer is an open invitation to keep your house cool and your oven in hibernation while the grill carries the load for a while. I’m honored to be partnering with America’s Test Kitchen to share some grilling tips and flawless recipes for your summer entertaining. ATK’s latest addition to their extensive cookbook collection is all about grilling, and it spares no details when it comes to all the tools and knowledge you’ll need to be a Grilling Guru this season.

asparagus, food photography, americas test kitchen, health eating

Grilling, Charcoal, Chimney Starter, ATKgrill

I have a pretty extensive cookbook collection and they all serve one purpose or another, they all have their tips to offer, some, I’m a die-hard believer in and others I take with a grain of salt. But this cookbook, or better yet – ‘guide,’ shall we say, in particular, is pretty much spot on with the techniques and approaches to what I feel is intimidating to the masses.

Americas Test Kitchen, Grilling Food

Ribeye Steak, Recipes, Grilling, Americas Test Kitchen

When I grill I use one-hundred percent all-natural hardwood lump charcoal, I like the flavor it imparts and I’ve used it for so long I couldn’t tell you why I left behind all the other options as it pertains to flavor, but I won’t be changing back anytime soon. I will say that I learned a little something during this process that was never apart of my barbecuing/cookout experiences growing up in East Tennessee. We never used a charcoal chimney – it was simply crumbled up newspaper nestled in the bottom of the grill and the charcoal arranged evenly over the top, a generous squeeze of lighter fluid and dinner was in motion. I must say though, I will never touch lighter fluid again due to my palate still having nightmares about the harsh aftertaste it leaves behind from excessive usage. I prefer the lump charcoal, it burns clean, quick and easy, and the flavor is awesome. But I always encourage everyone to do their research, and find what works for you.

When flipping through the book to find recipes to share with you guys, I wanted to do something different but since whatever I chose to prepare would also be dinner – I went with beef…because beef. I didn’t purchase anything too expensive, I purchased two bone-in ribeye from a local grocer for about twenty-six bucks and a bundle of asparagus for about three bucks. And compared to what we would’ve spent on a steak dinner out, this was a great deal in my book. I cooked the steak to medium but there are instructions in the book to guide you along on how to cook the meat to your preferred temperature. Remember, thermometers are always your best friend when cooking meat, or really most things in the kitchen!

Americas Test Kitchen, Steak Recipes, Grilling

I’ve been reading this book on and off for the last three weeks and I’m amazed at all the info that is crammed into roughly 430 pages, everything you ever wanted to know about seasoning, proper tools, recipe tricks, and more that will definitely equip to you to be a master of the grill. I hope you guys enjoy these two recipes as much as I did. The steak was so full of flavor and juicy, and the asparagus was a garlic-y, buttery dream with a little char for intrigue. Trust me when i say this won’t be just another book that collects dust on the shelf, you can purchase the book here. Cheers to grilling perfection!

Americas Test Kitchen

The Ultimate Steak
2 (1 1/4-to 1 1/2 pound) double-cut bone-in ribeye steaks, 1 3/4 to 2 inches thick, trimmed
4 teaspoons kosher salt
2 teaspoons vegetable oil
2 teaspoons pepper

1. Set wire rack in rimmed baking sheet. Pat steaks dry with paper towels and sprinkle all over with salt. Place steaks on prepared rack and let stand at room temperature until meat registers 55 degrees, about 1 hour. Rub steaks with oil and sprinkle with pepper.

2A. FOR A CHARCOAL GRILL Open bottom vent half-way. Arrange 4-quarts unlit charcoal briquettes even layer over half of grill. Light large chimney starter one-third filled with charcoal briquettes(2 quarts). When top coals are partially covered with ash, pour evenly over unlit coals. Set cooking gratin place, cover, and open lid vent halfway. Heat grill until hot, about 5 minutes.

2B. FOR A GAS GRILL Turn all burners high, cover, and heat grill until hot, about 15 minutes. Turn primary burner to medium-low and turn off other burner(s). (Adjust primary burner as needed to maintain grill temperature around 300 degrees.)

3. Clean and oil cooking grate. Place steaks on cooler side of the grill with bones facing fire. Cover and cook until steaks register 75 degrees, 10 to 20 minutes. Flip steaks, keeping the bones facing fire. Cover and continue to cook until steaks register 95 degrees, 10 to 20 minutes.

4. If using charcoal, slide steaks to hotter side of grill. If using gas, remove steaks from the grill, turn primary burner to high, and heat until hot, about 5 minutes; place steaks over primary burner. Cover and cook until well browned and steaks register 120 to 125 degrees (for medium-rare) about 4-minutes per side. Transfer steaks to a clean wire rack set in rimmed baking sheet, tent with aluminum foil, and let rest for 15-minutes. Transfer steaks to carving board, meat from bone, and slice into 1/2-inch-thick slices. Serve.

Grilled Asparagus

Serves 4 to 6
Use asparagus that is at least 1/2 inch thick near the base. Do not use pencil-thin asparagus; it can not withstand the heat and will overcook. Age affects the of asparagus enormously. For the sweetest taste, look for spears that bright green and firm, with tightly closed tips.

1 1/2 pounds thick asparagus spears, trimmed
3 tablespoons unsalted butter, melted
3 minced garlic cloves
Salt and pepper

1A FOR A CHARCOAL GRILL Open bottom vent completely. Light large chimney starter three-quarters filled with charcoal briquettes (4 1/2 quarts). When top coals are partially covered with ash, pour evenly over grill. Set cooking grate in place, cover, and open lid vent completely. Heat grill until hot, about 5 minutes.

1B FOR A GAS GRILL Turn all burners high, cover, and heat grill until hot, about 15 minutes. Turn all burners to medium-high.

2 Brush asparagus with melted butter and season with salt and pepper.

3 Clean and oil cooking grate. Place asparagus in even layer on grill and until just tender and browned, 4-10 minutes, turning halfway through cooking. Transfer asparagus to platter and serve.

This post was written in partnership with America’ Test Kitchen. All thoughts and opinions are mine.Master Of The Grill


Cast-Iron Skillet Chipotle Chili

Cast-Iron Chipotle Chili  
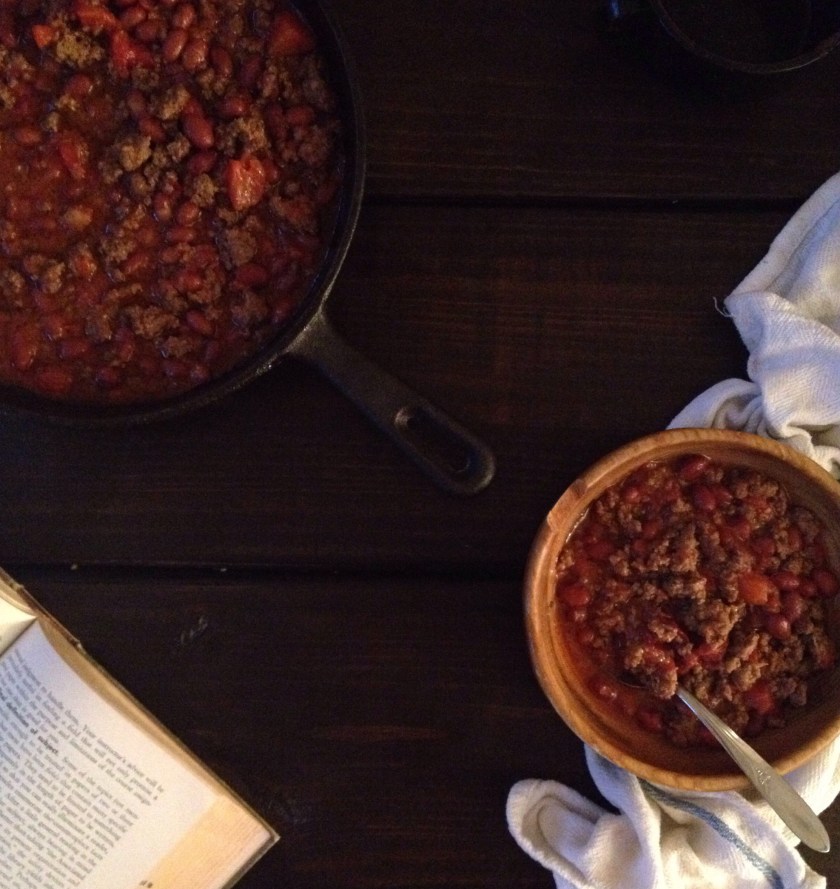
We could go around in circles discussing whether or not ‘real chili’ has beans in it or not. But I’m simply going to shut down that discussion because I’ve never known chili to ‘not have’ beans in it until I saw something about it on a cooking show, and all the Texans were giving the rest of us ‘bean in our chili’ eaters the “thumbs down”. And that’s ok…we forgive them!
In my book chili is an all year around meal because you can dress it up or dress it down according to the season. In the Spring, maybe you want a chili chock-full of full of fresh vegetables, and in the Summer maybe you desire something like a white chicken chili in a light broth. But it is indeed, undisputed that when the breeze begins to roll in from the hills and those leaves begin to burst into shades of burnt orange, cranberry and coffee — I want all the beef and canned tomato goodness with a kiss of peppery heat that one can stand, to fill my bowl to the brim. And this recipe gives you nothing less than that.Cast-Iron Chipotle Chili : The Salted Table
This recipe is also great for the adventurer within, so maybe you want to have a campfire in the backyard and invite a few friends or hang with the kids, maybe there’s a camping trip in your near future? This is the chili you’re gonna want for those “chili” nights in the wilderness.

You may be wondering why this chili isn’t smothered in avocado, sour cream, cheese and onions. If you are a lover of toppings then feel free because this chili may need to be cooled down if you’re sensitive to heat but I tend to be a purest if something’s made well and this chili is pretty darn perfect! So grab a warm blanket and eat a bowl…or two for me.The Salted Table Food Blog, The Salted Table, Nashville TN, Nashville Food Bloggers, Chefs, Personal Chef, Food Photography, Food Styling

Cast-Iron Skillet Chipotle Chili

1 lb 80/20 ground beef
3 Tablespoons Chipotle Chilies in Adobo (diced)
2 14.5 oz cans Red Beans
2 14.5 oz cans diced tomatoes
3 Heavy Tablespoons Chili Powder
2 Tablespoons Ground Cumin
1 teaspoon granulated garlic
1 Tablespoon Kosher Salt (to taste)

Method
1. Place your cast-iron over medium-high heat. Add your ground beef and crumble with a wooden spoon. Stir occasionally, breaking down the chunks of beef until meat is fully browned/cooked. Allow the liquid from your beef to reduce by half then, add your chipotle chiles, chili powder, ground cumin, granulated garlic, and salt. Stir until spice are incorporated into the beef but be careful not to burn, you may need to turn down your heat.

2. Drain excess liquid from your beans and add them to the beef along with your tomatoes. While occasionally stirring, you’re going to allow this to cook for about 20-30 minutes until the liquid begins to thicken and you have a hearty looking chili. Then you can taste to see if you need to add anymore seasoning.Cast-Iron Skillet Chipotle Chili, Quick Chili Recipes, Cooking, Dinner, Camping Food, Autumn Chili, Autumn Foods, Nashville TN, Food Photography

Notes:

Using dry beans: If you opt to use dry beans, simply soak them in luke warm water the night before you prepare the chili, this will cut down you’re cooking time though the beans will still need to be boiled off before allowing to cook in a cast-iron skillet.Cast-Iron Skillet Chipotle Chili


Collard Greens, Pork Belly, Turnips and New Year’s Tradition.

Collard Greens & Southern New YearI’m not a superstitious person to say the least, but I can’t fight tradition. For as long as I can remember my family has eaten the southern staples every New Year for the first twenty years of my life and then I may have fallen of the bandwagon a few times between twenty-one and thirty but who’s counting?

It simply goes without saying that I’m a sucker for comfort food and the first of the year is just a really good reason to gorge on all of my favorite southern eats. Excuse me while I get sentimental for a moment, if you follow, you’re used to it. If not–you’ll learn. Imagine for a moment sitting on a worn in sofa, you know the one where it’s the only place you’ll take a nap despite the piercing spring you feel on your hip bone. There’s a quilt draped across the back side for easy access when the sudden urge to nap consumes you. The smell of crispy pork bits are filling the living room with a light smoke that dances beneath your nostrils. Lids are trembling from steam fighting through the pots of collards and black-eyed peas. The sizzle of butter around the sides of the cast-iron work its magic on the cornbread and in that moment–your heart is full and your stomach overwhelmed with anticipation.

See, back then New Year’s resolutions were but a thing of some other culture. It was never spoken of at our house. It was more about the blessings of being alive another year, surviving the trials and tribulations that life had brought us the previous year. Reliving the joyous moments of life events and looking forward to what the year would bring. If memory serves me well, I believe collard greens brought ‘good luck’ and I could say without hesitation that a bowl of potlikker and a hot piece of buttermilk cornbread would be a perfect last meal contender.  And anyone graced with a bowl should consider themselves none other than lucky…or blessed. There’s nothing quite like it when you talk about southern foods.Collard Greens, Pork belly, Turnips and New Year's Tradition


But moving on, these collard greens are so easy to make that it’s a perfect side dish to accompany various meals. And I made them the way my great-grandmother used to with a nice slab of pork belly, but you may also use a ham bone or bacon if you please. I can even recall there being some ox tail in there a time or two, so as you wish. First, I pre-heat the oven to 450° and cook off the pork belly, skin side down for about twenty-minutes to render some of the fat off and get a nice sear. While that is cooking, I simply take three bunches of collards – I rinse them under cold water to remove any residual dirt that may be hanging around. I cut the stalk out of the center because it can be annoying to chew on, well at least for me, but hold onto them. Layer the greens, roll them, and cut them into 1/2 inch ribbons. Then take one quart of water and two cups of chicken stock or three bouillon cubes for two cups of water, the stalks and bring it to a boil. Throw in a couple teaspoons of kosher salt and Texas Pete…or Tabasco. Once the liquid begins to boil, remove the stalks and add the greens, cover the pot. I usually let the greens cook for about an hour and a half before I peel, chop and my turnips. If you put them in too early, they will turn to mush and that’s not acceptable. Allow the greens to cook for about two hours or so, though there are those who believe that they should be cooked twice as long, not I.

2015/01/img_2886.jpg


You can tell that the greens are done when you can penetrate them with a fork with ease, and they are tender. Not to mention, your eyes may involuntarily roll back into your head and your toes may curl. You’ll see what I mean. I love to eat greens with a hot pan of fresh made cornbread or lace hoe cakes, but my grandmother also ate them with a slice of white bread when the mood hit, so as you wish. This year has already been filled with so many changes and I’ve learned some new things about myself. Things that need improvement and things I didn’t even realize were there. Either way, I’m excited about making improvements for the better. I want 2015 to be a year filled with more ‘I dids’ instead of ‘I didn’t’s’. And I’m wishing the same for you this year. Discover something new about yourself and find ways to improve or maybe just enjoy what it is you discovered. But in the meantime, sit down and enjoy a hearty bowl of collard greens and pork belly, you deserve it.

2015/01/img_2887.jpg

Herbed Roasted Chicken & Vegan Spiced Apples & Potatoes

IMG_2896.JPGYou know those dishes that you create without any plan and you find yourself surprised at how well they come out? Well, needless to say this is one of those dishes. And yes, despite being trained to know how to cook, chefs indeed have those moments of ah-hah, that’s delicious. It’s not like the roasting of chicken is a complicated process that requires the need of bells and whistles because it doesn’t. And that’s why we flock to it as our go-to meal when there is minimal time for fussy dinner preparation. Not that I make fussy meals or anything, cough.

Over the summer my wife and I visited Asheville, NC for the Food Blogger Forum. An event where food bloggers gather and discuss our passion for food, blogging, and the art of creating community. I received a little jar of what was labeled vegan spice. At first, I had no idea what the heck the stuff was or how I was going to properly utilize it to fit into our meals, but one night I saw the spice while in the midst of trying to decode what we were going to eat for dinner based upon the scant selection of ingredients in our fridge. If there’s anything I hate more than folding laundry, its trips to the grocery store once I’m already home for the evening.

I looked in the fridge and there it was staring at me, a whole bird, two sweet potatoes, three new red potatoes and some Mutsu apples from Chattanooga that I had just purchased at Whole Foods Market. Before I knew it, I had reached for the cast-iron skillet on the shelf and I set the chicken in the pan. After a brief moment of hesitation I placed the chicken back onto a cutting board and proceeded to cut it in half after realizing we probably won’t eat the whole thing. I turned the oven to 425 degrees. I seasoned both halves of the chicken with kosher salt, fresh ground black pepper, finely minced thyme, oregano and I tucked two pats of unsalted butter beneath the skin, set it aside. I rinsed the potatoes and apples, removed any eyes from the potatoes that didn’t look edible and cut them into chunks. Just in case you were wondering I cored the apples. I tossed the potatoes and apples in two teaspoons of the vegan spice, one tablespoon of extra virgin olive oil, and a smidge of kosher salt and fresh ground black pepper, to taste.

I put the chicken in the center of the cast-iron skillet and nestled the potatoes and apples around it but being careful not to completely cover the skin, because crispy skin is the key to the perfect roasted chicken. I walked away and began to write this post while I waited for it to cook and for my wife to come home. The cooking time is somewhere between 45 min to an hour, of course this is subjective based upon your oven, so properly temp your chicken for a internal temperature of 165º. There may have been some Parks & Recreation in the backdrop, laugh-out-loud, because that show slays me! I’m so grateful for Netflix…sigh. But any-who, I hope you enjoy this recipe as much as the wife and I did. I’m already in need of ordering more of that vegan spice because I’ve been using it so often. You can order it here. Enjoy and I’d love to hear about some of your ah-ha dishes that turned out un-expectedly well.

Sweet Potato Pancakes with Southern City Flavors Sweet Potato Butter

Sweet Potato Pancakes with Southern City Flavors Sweet Potato ButterAutumn here in Nashville is settling in quite nicely and I’ve enjoyed the few Indian Summers we’ve already experienced (keep those coming mother nature). I believe this season is going to be a busy one and I’m not afraid of the challenge. Sometimes I find myself straddling the fence when it comes to major changes in my life but change is what keeps life interesting.

Lately, I’ve been contemplating ways to bring you guys more blog posts because I seem to be consistently getting the same feedback from my readers, “We love the blog, but we want more.” and I truly want to give you that but you must understand that working in the kitchen full-time plus my side projects doesn’t make it easy to find the time to sit down and process my thoughts not too mention take photos. So here’s what I’m proposing–I’m going to bring you blog posts that are shorter in photography in order to bring you more posts. Because it just so happens that food photography is the most time consuming part of preparing a blog post. My self-diagnosed OCD kicks in and all bets are are off–I could food style for hours and still not be happy with the final product.

Chocolate Chip Pancakes  and  Sweet Potato Butter PancakesHere’s the first post that introduces this new format, less photos, more posts, boom! I’m sure it will work out better this way and I’ll be giving you more poetic posts about the seasons with still life and random food knowledge because that’s me in a nutshell–random, poetic, food-loving freak.

Enough about me, let’s talk pancakes! A couple of months ago I received an e-mail from Southern City Flavors asking if I would like to try some of their most popular products. I typically turn down these offers because the pressure of receiving a product and disliking it feels so overwhelming sometimes. The thought of people putting all their hard work into these products and for it to be wasted on me if I don’t like it, can be a little exhausting. But that’s not the case with these products from Southern City Flavors.Southern City Flavors, Franklin TN

I still have several items to dig through but I’m under the impression that if the sweet potato butter is any indication of what the other products are like then I’m sold. The recipe for these pancakes are an adaptation from Esquire Magazine and I’m pretty sure it’s one of my new favorite recipes. The texture of the pancakes are dense, not light which I like a heavier pancake–I like that it absorbs the syrup and still keeps body unlike light pancakes that fall apart due to syrup overload. I actually split the batter in half and mixed in three tablespoons of the sweet potato butter and the other half received half of a cup of mini chocolate chips. Those of course were for the Mrs., she likes chocolate in everything which is one of the reasons I married her. I’ll be sharing more about these products as I find time to test them out in the future. Now, make yourself some breakfast for dinner, you deserve it!

Sweet Potato Butter Pancakes

2 cups all-purpose flour
2 ½ tsp baking powder
½ tsp salt

1/4 tsp.. cinnamon
1 egg, beaten lightly
1 ½ cups milk
2 tbsp butter, melted
3 Tablespoons of ‘Southern City Flavors’ Sweet Potato Butter

Mix together first three ingredients with a wooden spoon. (typically you would sift it for a fluffier pancake but I didn’t for the more dense texture). In another bowl, mix egg and milk, then add it to flour mix, stirring until just smooth. Then stir in butter. Now is the time to add in your sweet potato butter, or chocolate chips. I used my Black & Decker griddle but you can use a non-stick pan with a little cooking spray if you wish. Heat griddle on medium heat (250 degrees) for about ten minutes. Ladle batter to form pancakes of whatever size you prefer. Cook first side until bubbles form on top, and there won’t be many bubbles because this batter is heavier than your norm so you’ll have to use your pancake intuition, probably about three minutes; then flip and cook other side until it, too, is brown, about two minutes. Serve immediately with butter and syrup or just dollop a little more sweet potato butter on top if you’re not a syrup fan. Serves four.