Summer lamentations & Tomato Jalapeno Jam

I’m not sure where the time has gone but it left with no note on the night stand or a tepid wave. The summer time is officially gone and some of us never gave it the chance to leave with our pumpkin cookies, souffles and cakes. Even I was guilty of whipping up a batch of pumpkin, apple and cranberry biscuits for a food blogger gathering.Tomato & Jalapeno Jam: Recipe by The Local ForkfulI can’t help but to pause and think of all the fresh bounty that I never even tapped into. I think the wife and I will try tackling the company of a CSA box now and again. It would definitely assist in the rounding out of our diet which is simple in the least. At the end of the summer there’s always one last bunch of something that you come across and tell yourself you need. And thanks to the extended warmth this year we were blessed with more tomatoes than we knew what to do with at our fingertips. I had a bag of tomatoes sitting on the dryer that were on their last leg and so I decided to make jam. Most of our tomatoes met their demise with a clenched fist and a salt shaker but not these. They were destined to meet my favorite Cusinart pan with a little sugar, vinegar and salt. Not to mention a kiss of warmth from some jalapeno I had. I told myself many a time I was going to make Foodie with Family’s candied jalapenos which sound fantastic and I never got around to it, but it is still on my to-do list.

Tomato & Jalapeno Jam: Recipe by The Local ForkfulIt seems like yesterday the wife and I were making plans for the summer. No doubt, most of it would be consumed by work and the mundane details involved with being an adult. And now that I think about it, we never even made it to the pool once this summer. That’s an epic fail for us. But nonetheless, I was able to attend many farmers markets for the summers harvest and heirloom tomatoes were in plenty this year.

There were so many recipes that I wanted to blog but I knew I’d never get the time with working two jobs and the balancing act of marriage and blogging. Of course, marriage always comes first and I like it that way. Regardless of what sh!t food blogger says, this jam won’t sit in the fridge and rot. I’ve already knocked one jar off on crusty baguette and have plans to use more on a seared salmon dish, coming to a post near you. 
Tomato & Jalapeno Jam: Recipe by The Local Forkful
I grabbed a couple of jalapeno when I snatched these tomatoes from Bradley’s Farm stand and they sat on the counter for a couple of days before they were utilized in this jam. One of them began to turn a shade of red and while I was familiar with this I never questioned as to how this changed the flavor of the pepper itself. It turns out the heat actually becomes milder and you might say well the heat is in the veins. And Yes! This is true, but the fruit itself packs a little kick and what is there slowly dissipates with the deepening of the red and the color is quite the eye catcher. Tomato & Jalapeno Jam: Recipe by The Local Forkful

Tomato & Jalapeno Jam: Recipe by The Local Forkful

I can’t help but too pause and think of all the fresh bounty that I never even tapped into. I think the wife and I will try tackling the company of a CSA box now and again. It would definitely assist in the rounding out of our diet which is simple in the least. At the end of the summer there’s always one last bunch of something that you come across and tell yourself you need. And thanks to the extended warmth this year we were blessed with more tomatoes than we knew what to do with at our fingertips. I had a bag of tomatoes sitting on the dryer that were on their last leg and so I decided to make jam. Most of our tomatoes met their demise with a clenched fist and a salt shaker but not these. They were destined to meet my favorite Cusinart pan with a little sugar, vinegar and salt. Not to mention a kiss of warmth from some jalapeno I had. I told myself many a time I was going to make Foodie with Family’s candied jalapeno which sound fantastic and I never got around to it, but it is still on my to-do list.

Ingredients
adaptation via A Cozy Kitchen

3 lbs rough chopped tomatoes
2 medium jalapeno minced (optional)
1/2 cup of granulated white sugar
1 oz. red wine vinegar
1 tablespoon kosher salt
1 tablespoon of tomato paste

Method

1. First, rinse, core and chop your tomatoes into 1/4″ x 1/4″ cubes. Does not have to be perfect shapes. You can even rough chop the tomatoes. set aside.

2. Add sugar, vinegar, salt and tomato paste to your medium sauce pot over medium heat. Stir until all ingredients become a syrupy paste. Add your tomatoes. Let the mixture cook for about an hour over medium heat. Make sure to come back and stir the mixture often. You really shouldn’t leave the mixture for long periods of time so grab a magazine or two.

3. 45 minutes into cooking your jam should have reduced by 2/3 and be thicker with a nice sheen. At this point, add your minced and seeded jalapeno to the mixture. Allow to cook for another 15 minutes or so to allow the flavors to meld together.

4. Turn off the heat and transfer jam into a bowl (preferably stainless steel or glass) that is a good conductor of heat/cold. You are going to make an ice bath and set the bowl with the jam into the bowl that contains your ice/water mixture. Stir until the mixture is cooled down and the mixture has become jam consistency. The mixture should cling to the spoon. Transfer to a storage container and enjoy on crackers, bread, fish or chicken. Get creative.

When I thought about doing this post I remembered that jam doesn’t boil down to a whole lot. And since I don’t work far from a Williams Sonoma, you know I couldn’t resist these Weck Jars. Enjoy your jam and let me know what you’ve done with the end of your summer’s harvest? Though I know it isn’t over for everyone.

Weck Jars from Williams Sonoma via The Local Forkful

Zucchini ribbons in Sage Brown Butter

I sat down at the desk with my chilled glass of apple juice to the right of me. I thought I had it all figured out. The words had an extra week to find themselves since I didn’t get a post up last week. But as I set there at the desk wanting to share with you my hectic week, and the woes of working too many hours in a hot kitchen. I could only think of this heart-felt blog post I read on Thursday from The Merry Gourmet. I’ve grown fond of this blog as Merry is a great writer and a painter of vivid imagery through well composed lines. She is an oncologist who also has an affinity for cooking, baking and making eye-candy chocolate desserts. But any-who, as you scroll down to gaze over the zucchini recipe which makes an awesome side dish. Here is The Merry Gourmet post I’m insisting that you read and enjoy the peach bar recipe as well. I’m also a fool for a high crust to peach ratio. Enjoy.Zucchini Ribbons in Sage Brown Butter

Ingredients

4 medium-sized squash
1/2 cup unsalted butter
5-7 sage leaves
smidge of kosher salt(to taste)
fresh cracked black pepper(to taste)

Instructions

1. First rinse your zucchini and pat dry. Then grab a folded kitchen towel and stand your zucchini in the center of the towel to peel ribbons. If you apply too much pressure you will break your zucchini. Set ribbons aside on paper towels to soak up any excess moisture while your butter browns.

2. Heat your butter in the skillet on medium high heat until it begins to foam. You can not walk away from the pan. Throw in your sage leaves once butter has melted. Stir gently in a circular motion until you begin to see little bits of milk fat separate from the butter. Once butter has turned golden brown remove from heat quickly and add one tablespoon of chilled butter to keep your butter from burning. Return the skillet to the eye and add ribbons.

If you are confident, feel free to give it a few quick chef toss in the air to incorporate the butter throughout the ribbons. But if you are not confident use tongs or a wooden spoon to stir your ribbons.

3. Add your salt & pepper to taste. Continue moving the ribbons around as they will cook quickly because they are thin. Remove sage and use for garnish. Now, that was simple.Zucchini Ribbons in Sage Brown Butter

Simple Roast Chicken

Simple Roasted Chicken: Recipe by The Local ForkfulWe don’t eat a lot of red meat, pork or game in the Hunter household so I’m always hunting for ways to be more creative with the meats we consume a lot of. Chicken happens to be one of them along with turkey and assorted lunch meats from the deli. Chicken is such a simple bird to handle in the kitchen. It lends itself well to a bevy of different flavor combinations that will suit your own palate preferences.

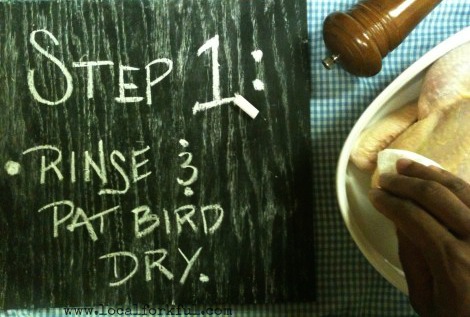
Jenna(my wife) and I work opposite schedules which means I typically I start dinner because I arrive home before she does. And I know that if I cook chicken; the two of us can live off the bird for at least two meals. So I never hesitate cooking a whole bird as opposed to parts. It’s much more economical to do so. And our first meal is typically roasted chicken and some side veg followed by something more creative the next night, like tostadas or pot pie. Today, I’m giving it to you in this fun simplistic format. Lately, I’ve been a little obsessed with making chalkboards since I made them for a friends wedding. And so I decided to give you the step by step with my latest chalkboard creation made with a piece of scrap wood that I simply sanded the edges down. Enjoy!Simple Roasted Chicken: Recipe by The Local ForkfulSimple Roasted Chicken: Recipe by The Local ForkfulSimple Roasted Chicken: Recipe by The Local ForkfulSimple Roasted Chicken: Recipe by The Local ForkfulSimple Roasted Chicken: Recipe by The Local Forkful

And Last but not least, always make sure you’re bird is 165 degrees plus. I can’t bare the thought of anyone eating uncooked chicken.


Basil Simple Syrup

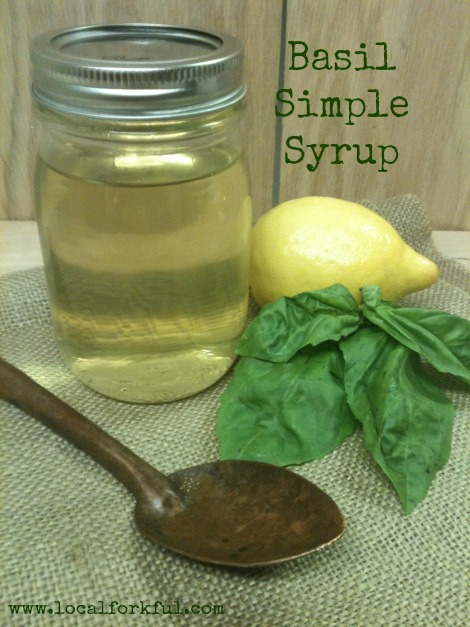
How to make Basil Simple Syrup: Recipe by The Local ForkfulThe Summer is coming to an end so quickly and I have so many recipes that I want to give you. But my, how times flies when you’re having fun. Well, that’s a lie. You all are having fun while I’m working six days a week, blogging and trying to squeeze in the occasional nap (sigh). But any-who, here is a simple recipe that will be a great addition to all of your summer cocktails and beverages. A little bit of basil, sugar and water opens the door to a plethora of pool-side drink concoctions. Enjoy!

Ingredients

1 cup Basil Leaves
1 cup water
1 cup sugar

Directions

1. In a sauce pot on medium high heat. Add the water and sugar. Allow the mixture to come to a boil or until liquid is clear and there are no sugar crystals visible. Once mixture is boiling, toss in basil and let boil for 1 minute. Remove from the eye, cover and let basil steep for 2 or more hours. Strain mixture and store into a container. It will keep for up to 2 months, but it probably won’t last that long.
How to make Basil Simple Syrup: Recipe by The Local Forkful

Serving Suggestions:

I personally enjoy using the syrup in lemonade, cake recipes and icing. I heard it also makes a killer cocktail! Let me know what creative ways you use your simple syrup.

Basil can also be substituted for Rosemary, Mint or Thyme(only 1/2 cup for Thyme).
How to make Basil Simple Syrup: Recipe by The Local Forkful

Peach Bourbon Crostata

The Peach Truck Peaches: Photo by The Local Forkful I contemplated long and hard about giving you last years Peach Truck recipe. But I couldn’t resist upping the ante and letting my readers see our progression since our first year of amateur blogging. And yes, we still have a lot to learn. Any-who, you can find out all about Stephen and Jessica Rose and their Peach Truck adventures here.

Peach Bourbon Crostata: Recipe by The Local Forkful The Summer time yields some of nature’s best gold. Stone fruit being at the top of my list and then I work my way down to berries and greens. The Peach Truck peaches are really good and all it took was two failed attempts before I obtained the little jewels that lie before you in this crostata.

I enjoy a nice slice of pie as much as the next person, but everyone does pie. And I don’t aim to give you average friends. My thought process typically involves Googling many a recipe and stalking many food blogs to see what hasn’t been done. And well, I don’t think you’ll be finding this somewhere else anytime soon. Peach Bourbon Crostata: Recipe by The Local Forkfu A crostata is a form of Italian pastry highly regarded for it’s versatility. You can make this dessert in a free-form format like I did, or use a tart or pie pan. The pastry can also be made smaller and enclosed with a lid for easier travel. Either way you decide to go about it, all forms are delicious.

I actually use the crostata dough recipe for the base of many dessert vehicles. I like the flavor and texture. It’s mildly sweetened from the butter, flaky and light(depending upon how thin you roll it out). One thing about using produce thats in season. If I’m going to make something where I want the filling to shine because its in season then I typically allow it’s vehicle to take a backseat. And these peaches don’t like sharin’ the spotlight ya’ll.Peach Bourbon Crostata: Recipe by The Local Forkful

I consider this recipe to be a rather simple one. Some of the things I can conjure are pretty labor intensive. I hope you have your favorite summer fruit, canned preserves or maybe some Bavarian cream that will fit perfectly in this crostata. As for me y’all, it’s all about The Peach Truck.

What have you been baking with your #summergold?

Brown Sugar & Bourbon Simple Syrup

100 ml Jack Daniels Tennessee Honey
1/3 cup of Dark Brown Sugar

For Pie filling:

3 peaches pitted & sliced

Crostata Dough:

2 cups AP flour
1/4 cup sugar
1 teaspoon sea salt or kosher
1 1/4 sticks unsalted butter, small cubes
1/4 + ice cold water
1 teaspoon granulated sugar (decor)
1 egg yolk + heavy cream to brush shell

Directions (yields 2 crostatas)

1. In a 1.5 quart sauce pan. Combine bourbon and brown sugar over medium heat until all sugar is dissolved. Then allow to simmer for two to three minutes or until mixture is reduced by half. Mixture should be syrupy and coat the back of a spoon. Set aside and allow to cool.

2. Once mixture has cooled. add half of your sliced peaches and toss until all peaches are evenly coated. Allow to set for two hours or over night.

3. Place the first four ingredients of dough into a large mixing bowl. If you’re afraid to get dirty, then break out your food processor. You know the drill. If not, click here. Moving on, gently toss together the ingredients. Begin to pinch the butter while simultaneously mixing it in with the flour. Do this until you see pea size lumps begin to form.

4.Once mixture is mealy, add ice water two tablespoons at a time until dough comes together. You should be able to squeeze it and get clumps. but also be able to spot little specks of butter.

5.Pour dough onto lightly floured surface. Form into two balls and wrap in plastic wrap. let the dough rest for an hour or freeze up to a month if you’re only making one crostata.

6. Preheat oven to 425 15 minutes prior to removing dough from the fridge. Place dough on to lightly floured surface and roll out in to an 12-inch disk. During rolling, occasionally toss a little more flour underneath dough to deter from sticking.

7. Drain the juice from your peaches. Place peaches in a spiral pattern layering them one on top of the other. Or just throw them in the middle of the dough and spread’em. Just leave about 1 inch of dough all the way around so that you can encase your filling. Using a flat spatula or pizza peel slide tart on a lined or buttered sheet pan and bake for about 22-26 minutes. And if you’re at all familiar with baking. Then you know that no two ovens are alike.

Serving Suggestions:

In the photo, I garnished the crostata with the a vanilla bean chantilly cream. (recipe follows) And the finished tart was accompanied with some vanilla bean ice cream. To each his own but I prefer Blue Bell. And as always, opinions are all my own.

Vanilla Bean Chantilly
1 pint heavy whipping cream
1 vanilla split and scraped
1/2 cup 10x (powdered sugar)
1. combine all ingredients in standing/hand held mixer. Whip for 3-4 minutes until mixture comes to stiff peaks or holds to your your beaters or whip attachment. Enjoy!