Banana Peel Bacon

First things first, I don’t really care about any negative opinions you may have about this recipe. It is not for everyone and I’m fully aware of that. But if by chance you live a no waste lifestyle, or you are a vegan, or vegetarian who misses the crunchy smoky goodness of a once known porky strip. This recipe is for you! This recipe caused a raucous on twitter, and people are very opinionated about vegan food; to the point of making you a little uncomfortable. Don’t be one of those people please. 

I was inspired to make this after I saw Tabitha Brown try it in one of her cooking videos. Apparently the Facebook algorithm thought I needed this in my life. But after Tabitha made the faux bacon, she expressed that she was not a fan, and I saw that as a challenge to make a version that was tasty. I watched several videos, and read a few recipes before attempting it; because typically after some research–you gather enough information to figure out where some people went wrong, and where there’s room for improvement. But that’s all subjective, just because I think my version is good, doesn’t mean you will, and I’m okay with that.

As a personal chef, I’m always up for a challenge. I cook for vast array of clients with many different needs, and I had some free time on this particular day. So attempting to turn banana peels into something that their not didn’t seem so farfetched. I mean–I’ve made a pretty mean lentil meatloaf before. And if you purchase conventional bananas for this, scrub the peels first due to the pesticides, and synthetic ingredients that bananas may be treated with, or as recommended by Alicia Kennedy on Twitter, get your bananas from a trusted source, and make sure they’re fair trade, if you are able to do so. 

This is a great weekend project, and something fun to do with the kids. You could even refrigerate the peels for up to two days before tackling this.

Banana Peel Bacon

  • 1 tablespoon soy sauce 
  • 1 teaspoon vegan Worcestershire sauce
  • 1/4 teaspoon onion powder
  • 1/4 teaspoon garlic powder 
  • 1/4 teaspoon kosher salt 
  • 1 teaspoon dark brown sugar 
  • 1/2 teaspoon liquid smoke 
  • 1/2 teaspoon smoked paprika 
  • 1/4 teaspoon black pepper
  • 2 banana peels, cut into 4 strips
  • 1/2-3/4 tablespoon avocado oil

Method

  1. Using a spoon, knife, or offset spatula scrape the pulp from the skin. Discard. Combine all of the marinade ingredients in a bowl, and blend until combined. 
  2. Add the peels in a flat layer making sure to evenly coat them. Let them sit in the fridge for 2-4 hours. 
  3. In a cold skillet over the eye, with a little neutral oil, lie down the peels with half an inch of space between them (do not overcrowd the pan). Do not put any excess marinade in the skillet, but don’t rub the peels free of the marinade. Over medium low heat let the peels begin to sizzle, and sputter for a couple of minutes, then flip them. Do this 2-3 times until the sugars have caramelized, and the peels are becoming dark, and pruny. The appearance could be different based upon the bananas you use. After about 12 minutes, I removed the peels, and placed them on wire rack to cool. Serve immediately, or store in an airtight container. Only good for about 48 hours.

NOTES: You may also make this recipe with carrots, and eggplant. And I’m sure there a few other vegetables out there that would work. If you try them out, come back and tell the rest of us how it went. I used low sodium soy sauce to cut down on some of the salt content if that is a concern for you. I also think this would be nice with some spice, so feel free to add a couple of dashes of cayenne, some crushed red pepper flakes, or some chili paste in the marinade.

Malted Milk Chocolate Chip Cookies

I hope you are taking care of yourself. I hope you’re inhaling, and exhaling as often as possible in an intentional sort of way. You know the way that involves a candle, some hot tea, and a little self-reflection. It sounds mundane, and you’ve heard it all before, but I believe it helps. I have found myself so overwhelmed with emotions over the last year, often finding myself tearing up for no reason, and all the reasons. Which probably explains why I’ve been baking so much. And I have no apologies for that. It started a month or so into the pandemic last year, and while it has lessened a bit, its definitely still happening more than the typical. Because I need dessert, and you all need dessert. So I come with the dessert for you.

These cookies were an experiment from quite a while ago, and I came across it in one of my food journals, decided to make them, and share them on social media where they took off. And ever since I have had someone send me an image of their cookies, and I love it. Because I feel like chocolate chip cookies have the power to keep us sane, but don’t let me deter you from professional help as well. Malted milk chocolate chip cookies will only take you so far.

Chocolate Chip Cookie Recipes, Cookies, Baking Recipes
Malted Milk Chocolate Chip Cookies, Chocolate Chip Cookies, Cookies, Chocolate Recipes

I also put this recipe out into the inter webs one night, and forgot to mention the half of a teaspoon of kosher salt, and that the butter is blended with the sugar in the first step. That won’t happen this time, and I formally apologize to anyone who made them without salt. Forgive me! And yes, you can brown the butter for these, and yes, you can omit the malted milk powder but I don’t recommend it. I just know that not everyone will have access to it, but that shouldn’t keep you from a legit chocolate chip cookie. And I would like to give credit to Sarah Kieffer of the Vanilla Bean Blog for the pan banging method. This is not that similar to her recipe, so don’t expect that crinkle look, but it will give you an excellent chewy cookie, which is the only cookie I want in my life, unless we’re talking about Girl Scout Thin Mint cookies. Anyways, make these cookies, close your eyes, and clear your mind before taking that first bite. And let that chewy chocolate chip goodness wash over you.

Malted Milk Chocolate Chip Cookies, The Salted Table, Nashville TN, Personal Chef

Malted Milk Chocolate Chip Cookies

  • 1/2 cup unsalted butter, melted
  • 3/4 cup dark brown sugar
  • 1/3 cup granulated white sugar
  • 1 large egg
  • 1 1/2 teaspoons vanilla extract
  • 1/2teaspoon kosher salt
  • 1/2 teaspoon baking powder
  • 1 1/2 tablespoons malted milk powder
  • 1/2 teaspoon baking soda
  • 1/2 tablespoon cornstarch
  • 1 1/2 cups AP flour, not sifted
  • 2 cups, plus 1/4 cup blended chocolate chips.
  1. Heat the oven to 350°. In a bowl, blend the sugars, butter, salt, vanilla, and egg with a whisk until smooth, about 2-3 minutes. I like for most of the sugar to dissolve for a cookie that’s not granular. That drives me crazy, lol.
  2. Fold in the flour, baking soda, cornstarch, and the malted milk powder until combined. Then, fold in the 2 cups of chocolate chips, and set the 1/4 cup of chips to the side.
  3. Portion the dough onto a greased, or lined cookie sheet, leaving an inch or so between each ball of dough. Lightly press down, but not too much, and use some of the chocolate you have left to press into the top of the dough. And save some for when they come out of the oven, or simply grab some more from the pantry based upon your personal love for chocolate.
  4. Bake for 6 minutes, then lift the pan about 3 inches off of the rack, and drop it. We want to deflate the cookie so that it is chewy, and dense verses fluffy. Bake for another 3 minutes and repeat. After an additional two minutes, remove the cookies from the oven and drop them for the last time on top of the oven or counter.
  5. Then, remove them from the sheet pan so they don’t continue to cook. We want to preserve that chewy situation that we are getting ready to indulge in. Allow to cool for several minutes, or grab a glass of milk, and dig in, because warm cookies are a gift from the Lord himself.

NOTES: The cornstarch, I’m told makes for a chewier cookie, so why not up our chances. As far why the baking soda is in the recipe, I’m not sure, since there is no acid to activate it, but I haven’t made them without it before, so I didn’t see the need to change it. Feel free to make them without it, and come back to let us know if you notice any changes.

And I believe this is solid brown cookie base, so take liberties with it. If you have butterscotch chips, toasted nuts, toasted coconut. Toss them in, and make the cookie your heart desires.

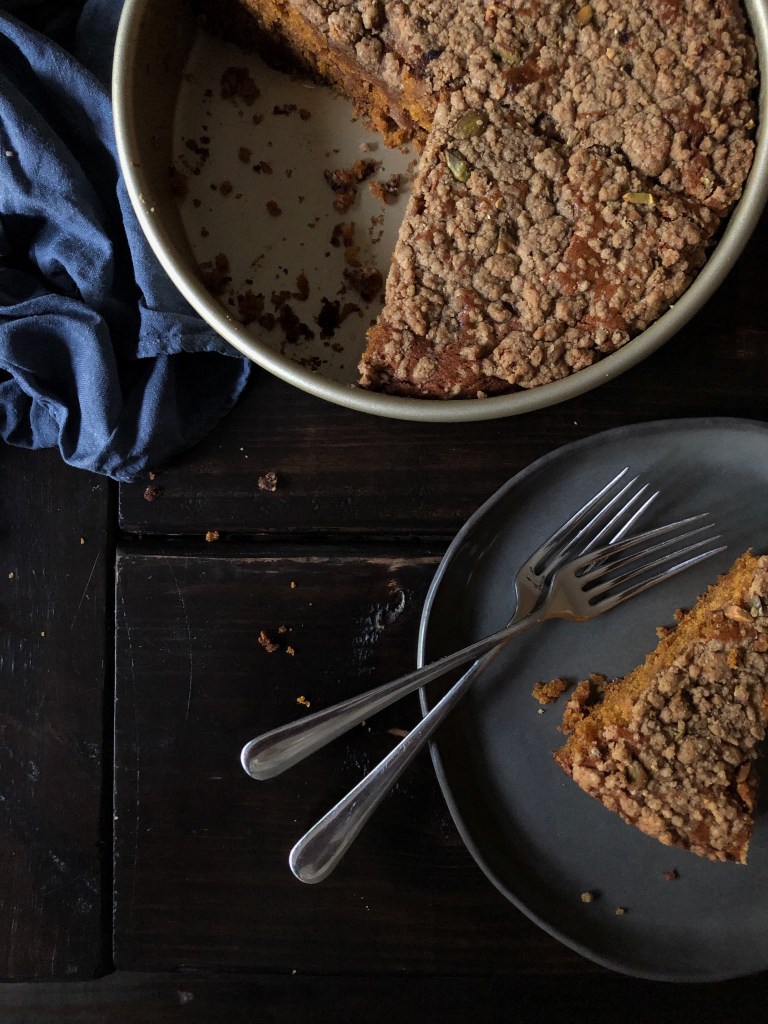
Morning Cake with Pumpkin, & Pistachio Streusel

Vegan Pumpkin Cake w/ Pistachio Streusel

Tell me all the things you enjoy about Autumn. And don’t worry, its okay if Autumn isn’t your season. No judgement here. But maybe there’s a characteristic about it that you appreciate. The golden evening light, the leaves changing colours, cooler weather, or maybe your a pluviophile like myself and love the rainy days. Either way you feel about it, it is indeed the season I prefer over the other three.

I feel rejuvenated in Autumn. Theres a feeling of newness in the air and I breathe it in deeply. Its so much more than changing of the harvest and what makes it to your dinner table. Its a season that exudes the joy of gathering together. Gathering together around fire pits, along porch verandas and the holding of hands down neighborhood streets. Its mornings met with slow sunrises that you’ll actually get to catch if you’re a late riser.

It doesn’t have to be Autumn for me to be in the baking mood. I know some refuse to turn on their ovens during the warmer months, but I’ve never been one to say no to my cravings. Especially when that craving is for cake. A baked good who’s presence I enjoy at breakfast, lunch and dinner. Which makes this Morning Pumpkin Cake with Pistachio Streusel the perfect cake to get your Autumn baking off to a good start. And I have every intention of trying this with butternut squash, and sweet potato puree. I hope you enjoy it as much as I do.

Vegan Pumpkin Cake w/ Pistachio Streusel

Vegan Pumpkin Cake w/ Pistachio Streusel

Morning Cake with Pumpkin, & Pistachio Streusel (Egg-Less)

Prep: 10 minutes
Baking Time: 40-50 minutes

3-½ cups White Lily AP Flour
2-¼ cups White Granulated Sugar
2 teaspoons Baking Soda
3/4 teaspoon Baking Powder
1 teaspoon Kosher Salt
2 tablespoons Pumpkin Spice
1 teaspoon Vietnamese or Saigon Cinnamon
2-¼ cups Canned Pumpkin
1 teaspoon Vanilla Extract
1/2 teaspoon Almond Extract
1 cup Coconut Oil
⅔ cups Lactaid Milk
1 teaspoon Rice Wine Vinegar

Pistachio Streusel
6 tablespoons chilled unsalted butter, chunked
1 1/2 cups White Lily AP Flour
1/2 cup dark brown sugar
Heavy smidge kosher salt
1/4 cup chopped pistachios

METHOD:
1. Streusel: combine all the ingredients together in a bowl. Coat the butter with the dry mix. Smush the butter between the side of your index finger and thumb while mixing it into the dry ingredients until you have a crumbly mix. Be careful not to over mix. Place back in the fridge while you make the cake.

2. Preheat oven to 350ºF. Grease the bottom of a 9 inch cake pan or two 9 x 5 inch loaf pans. If you use the 9-inch pan, there will be extra batter left. Make muffins with it, or refrigerate it up to 3 days.

3. In a large bowl, combine flour, sugar, baking soda, salt, cinnamon, and pumpkin spice. Add pumpkin, oil, extracts, milk and vinegar to flour mix. Fold gently until just moistened. Be careful not to over-mix.

4. Spoon batter into the pan/s, cover the top evenly with the streusel. And bake for 45–50 minutes or until a toothpick inserted in the center of a loaf comes out clean.

5. Allow bread to cool in the pan/s on a wire rack for 15 minutes. Turn the cake out onto a cooling rack. Cool completely before slicing.

Vegan Pumpkin Cake w/ Pistachio Streusel
Vegan Pumpkin Cake w/ Pistachio StreuselNOTES:

I’ve only tried this recipe with the ingredients listed, so I can not promise you that substitutes will yield the same product that I was happy with. If you do try substitutes, and you’re happy with the results, please return to leave a comment and let others know.

Cured Egg Yolks

So, I think we should start this off on a note of honesty. I rarely make cured egg yolks because it calls for such an inordinate amount of sugar and salt and you can’t really reuse it once it has absorbed all of the moisture from the yolks. But if you have egg yolks that are still intact from making meringue or an egg white omelette, then this is one of the many things you can do with them. Remember, no yolk left behind.

The process is simple and nothing to be intimidated by. You could even do this with your kids, if you have them, but if not – then by yourself or your significant other is just fine. This technique is guaranteed to impress your friends, assuming they aren’t already in the ‘egg preserving’ circle. When I first made these, we had to take off to East Tennessee for a week because my mother-in-law passed out, hit her head and was hospitalized. So, my yolks actually sat in the fridge for 9 days before I got back to them. At this point, they were nice and dry so I didn’t bother putting them in the oven to dry them out more – but you may need to if you let them go the recommended 3-6 day period like most guidelines say to do. And if you want a softer version, simply let it go for 12-hours and you will achieve a runnier egg that is great for serving with crostini and smoked fish, or maybe just a schmear across your morning toast.

img_4905-1This procedure is from The Splendid Table via America’s Test Kitchen. And once you learn the process, you’ll be able to riff and create your own seasoning blends and find out what flavor profiles you do and don’t like. In this batch I added five bay leaves, and a heavy teaspoon of crushed red pepper flake. The spice took a little bit but not enough to make a significant difference, so I would up the quantity next time until I achieved the level of heat that I desire. But enough chatter, the recipe is below and if you make them, tag us @thesaltedtable on Instagram, I’d love to see your results!

“Contrary to popular belief, diamond is not the hardest material known to man. The hardest material in the universe is dried egg yolk. And one day, it will revolutionize the construction industry.”
Ron Brackin

img_5398

Cured Egg Yolks

1.5 cups white granulated sugar
1.5 cups Diamond kosher salt
4 egg yolks
5 bay leaves
1 teaspoon crushed red pepper flake
1 1-2 inch deep dish

Method:
1. Combine sugar, salt, red pepper, and bay leaves in a blender and pulse until ingredients are combined well. Bay leaves and crushed red pepper should be sugar size particles.
2. Pour half the mixture into the bottom of your dish. Take an unbroken egg and use the shell to make indentions in the sugar/salt mixture, or you may use the back of a spoon. Make four spaces and place a yolk in each one. Cover the yolks with the remaining mix.
NOTE: I lightly pressed my fingertip on top the yolk to remember the placemat for later retrieval.
3. Cover the dish securely with plastic wrap and place pan in the fridge. Once the eggs are ready. Do a quick rinse to remove any residual mixture that is still attached. Place them on a wire rack in a 150 degree oven and let them go for about 1.5-2 hours or until your level of dryness is reached. That’s it! Your are ready to grate those babies over soups, pastas, salads and sandwiches. Enjoy!

NOTE: I simply wiped mine off with a damp paper towel and allowed them to dry at room temp before placing them in a weck jar for safe storage. Eggs are good in the fridge up to a month, if they last that long.

A video clip and close-up of the final product:


(ENDED) Cooking Class: Southern Supper + Stories w/ University School Evening Classes

Do you enjoy cooking classes? Do you like the one-on-one interaction with a culinary professional? Do you enjoy eating a meal you got to watch be prepared in front of you? Well, I’m offering you just that on February 9, 2018!

It’s going to be my third year teaching a cooking class with my friends at The University School of Nashville, and I’m truly excited for this year’s class. I’ve decided to share with you some stories from my life growing up in East Tennessee. And I hope that doesn’t feel as boring as I think it does, because you haven’t lived until you’ve gotten off the school bus and seen squirrels being skinned or a turtle boiling in an extra large stock pot. Also, spoiler alert, I don’t recommend this class for my vegetarian/vegan friends. Sorry.

If you haven’t had the opportunity to experience a class with The University School of Nashville, then you are missing out. There will be wine, delicious food to gather around, and hopefully you’ll leave with some ‘new’ friends who love a good meal just like yourself! Did I mention, there’s wine?

http://www.eesomeco.com

Once you register for the class by clicking this link, you will receive an email from USN about the location of the class. Its typically in the home of a parent of a child who attends USN, and the kitchen is always spacious and houses everyone comfortably for the evening. There’s no worrying about the tall guy standing in front of you like a concert at Exit/Inn (you Nashvillians understand where I’m coming from).

http://www.eesomeco.com

Feel free to bring an apron with you if you would like to assist me with any chopping, stirring or maybe just some taste-testing. I encourage all of those things whole-heartedly! I’ve always been a believer that food taste best when enjoyed with company, and I look forward to sharing that belief with you. And I’ll leave you to be the judge once the class is over!

Not too mention! Half the fee goes to fund a need-based scholarship endowment at USN. So you’re eating for a good cause! At least, that is how I see it! There’s more info below from the USN Evening Classes website below. See you there friends!

HOW TO REGISTER 

Online: Go to the Class Catalog to sign up for classes.  We accept Visa, MasterCard, and American Express.

Phone: Call 615-321-8019 between 9 am and 3 pm weekdays beginning Thursday, December 7th.  Have your class numbers and VISA/MasterCard/American Express credit card information ready.  Please do not leave registration information on the voice mail system: it will not be processed.
Mail:  Print out the registration form and mail it with a check (made out to USN Evening Classes) or your VISA, MasterCard, or American Express credit card information to:
USN Evening Classes, 2000 Edgehill Ave., Nashville, TN 37212. Registration forms will not be processed until December 7th, 2017.
Students are not considered registered until full payment is received. Students will receive a confirmation vie email or mail.  Please note: only registered students may attend class.  We do not allow students to bring guests. Students may enroll in most classes up to the date of the class, space permitting.  Instructors cannot accept fees.
These images were taken for a photoshoot for Trim Menswear by my talented friends at Eesome Co.  If you check the website, you might see a familiar face! And grab some incredibly comfortable t-shirts while your at it!